BOUNDS Montana Provider Portal Support Page
Q: How do I contact Montana OIG
A: You can contact them directly by using the Messages Tab. Follow the instructions in the Messages Tab section.
Q: How do I update my password?
A: Select your name at the top right to update your password. See more about updating your account information here.
Q: My name isn't correct, how can I change it?
A: You will need to contact Montana OIG directly to change your name, use the Messages tab. See more in the Messages Tab section.
Q: I have Actions Required what does that mean?
A: Each item on your Action Required tab is an item you need to complete. See the Action Required Tab section.
Q: I have a message when I login that says, "You have applications that have been saved but not sent..." what do I do?
A: Go to your Forms and Links Tab and open the spy glass next to your application. If you've filled in all of the questions, click / tap the send button that is to the right of the save button. This will submit your application to the state and complete the application item on your Action Required Tab. When it is sent you'll see a submit date next to the application when you reload the Forms and Links Tab.
Q: The item on Action Required isn't clickable.
A: If the item isn't clickable go to your Forms and Links Tab and all of the forms can be found there. See more in the Forms and Links Tab section.
Q: Did I complete my action required items?
A: Action Required items move to the Show All tab when they are complete. See more in the Action Required section. If an action is still showing, it may be waiting on the program to review your submission.
Q: How do I send in my filled out form?
A: Once you have filled out and saved your form follow the instructions in the File Upload Tab section.
Q: How do I upload documents or forms in my portal?
A: Follow the instructions in the File Upload Tab section.
Q: I submitted my forms why are there no complete dates?
A: The forms have to be accepted by Montana OIG. Once the program accepts your submissions you will see a completion date for them. See more in the Forms and Links Tab section.
Q: How long after I complete my action required items do I have access to the portal?
A: Until you leave the program and they inactivate your account.
Back to Topics
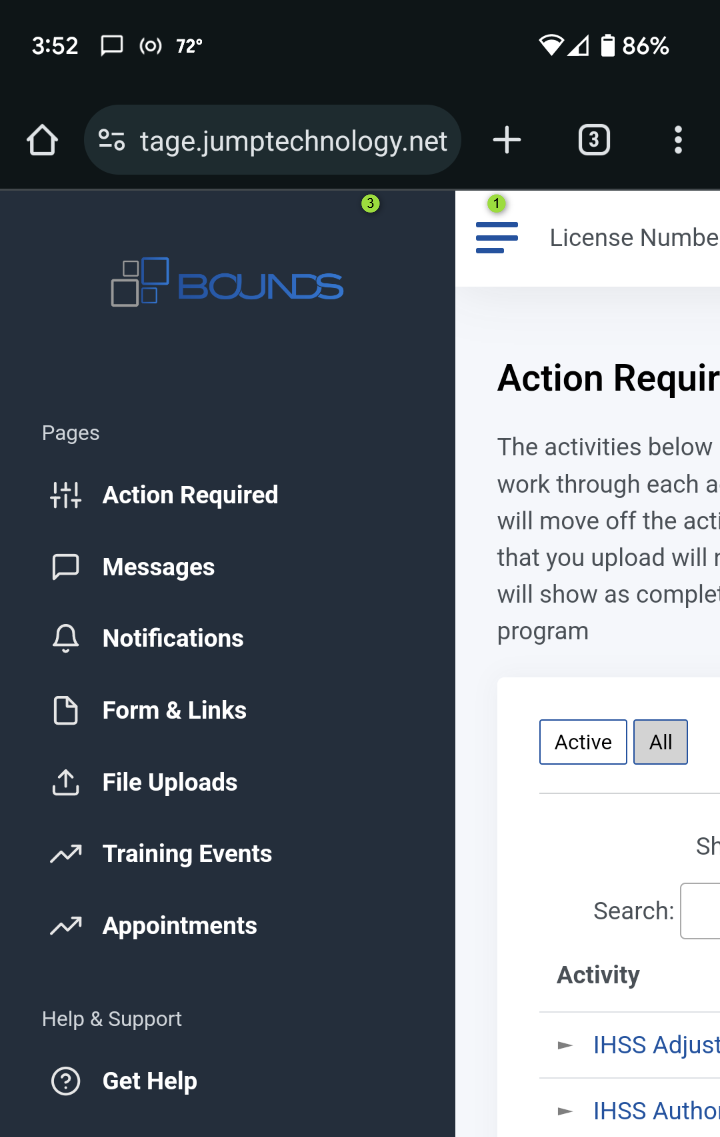
The provider portal has been updated to work better with mobile devices. Here are some tips for features on any device including mobile where the screen you're on may be smaller than a larger desktop computer or laptop screen. On a smaller device the left menu may not be readily viewable to save screen space. You may select the 3 lines (#1) to show the side menu. Also pointed out here is the Arrow (#2). This is important because in a mobile phone portrait view (holding your phone normally) the remaining columns in a data grid will be collapsed.

Here you can see the 3 lines (#1) have been tapped and the menu (#3) is revealed.
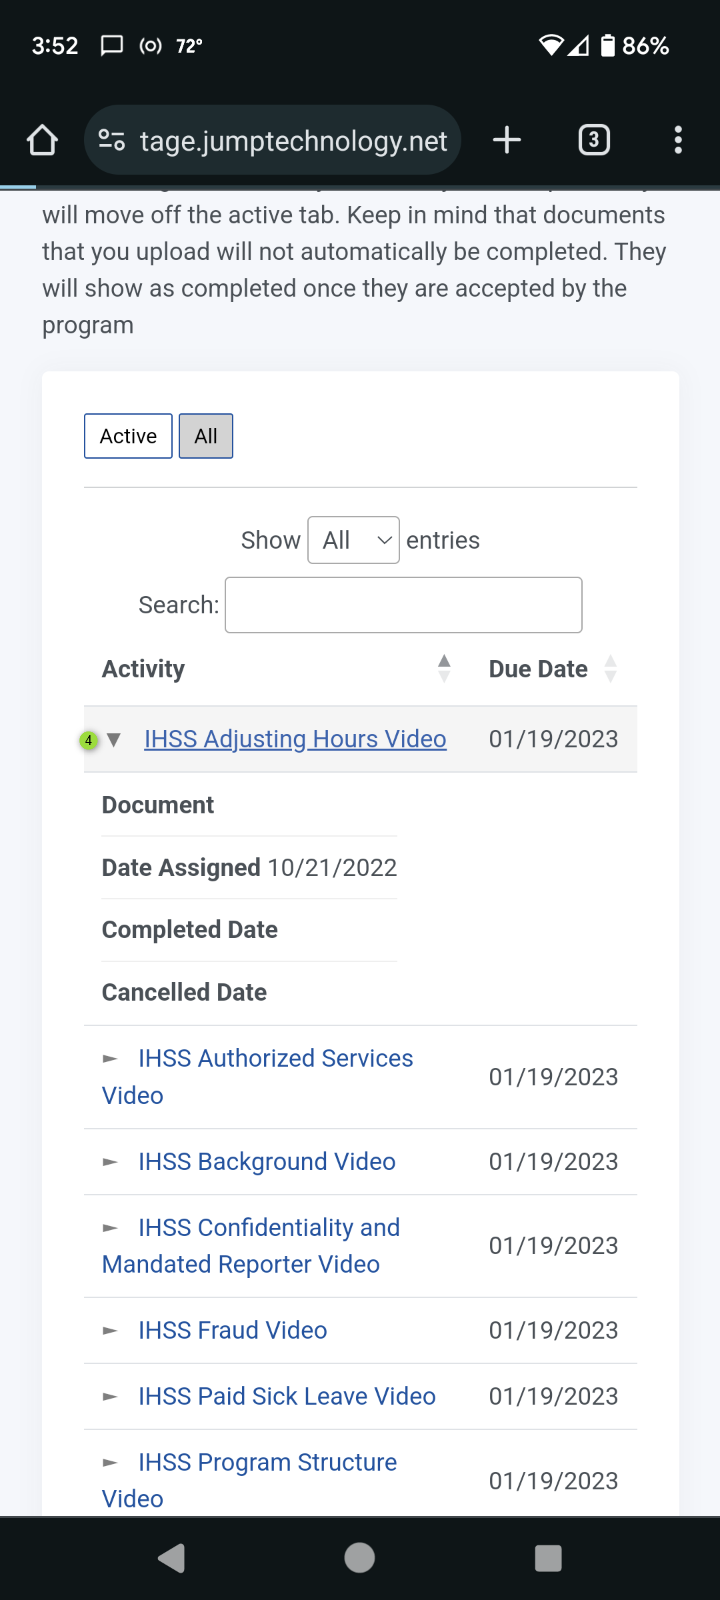
This example shows the arrow (#4) has been tapped and the rest of the columns for the line item in the data grid how are revealed.
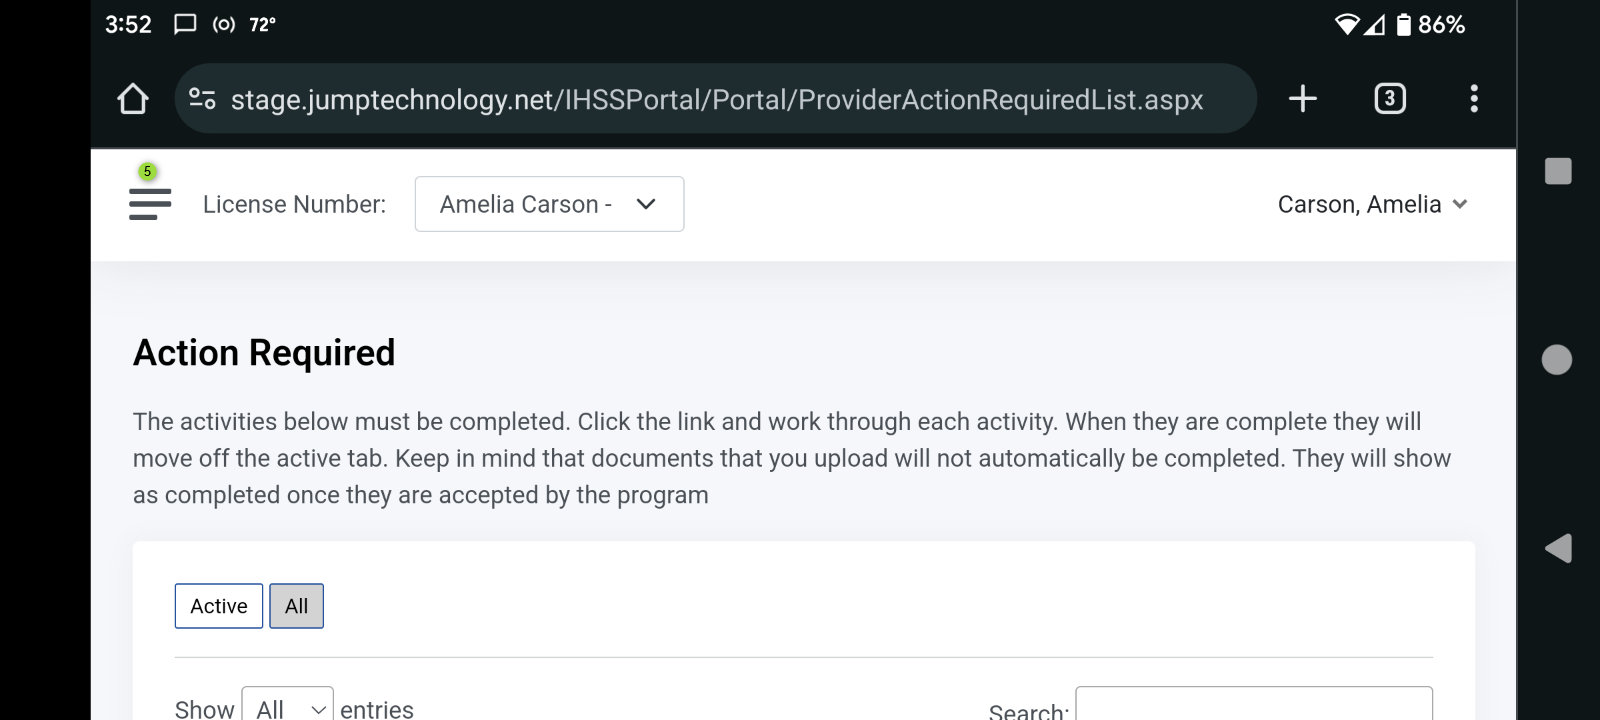
Here you can see the same page in landscape (holding your phone sideways) to view the page in a wide width. The menu (#5) is hidden.
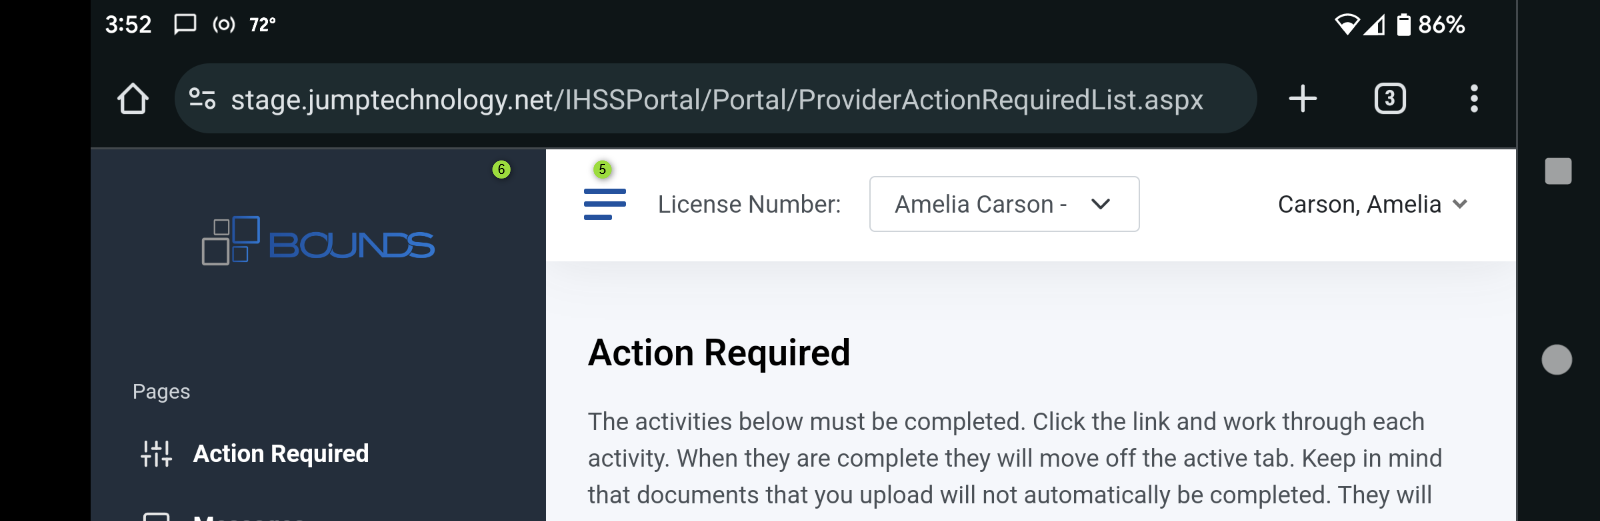
Here the menu (#5) is expanded (#6)
Also viewing the page with the phone sideways we can see all of the columns in the data grid in this example.

Back to Topics / Back to Top
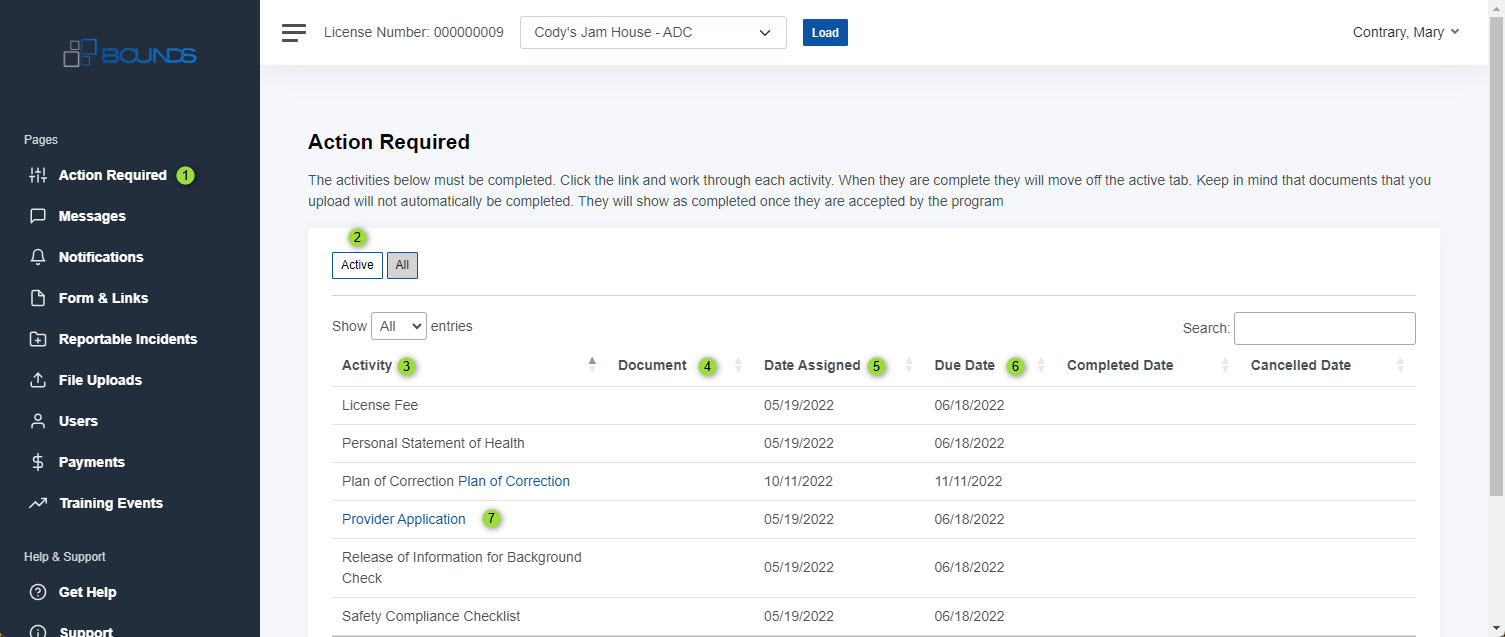
When you first login you’ll see your Action Required (#1) tab. This is a list of the tasks to complete your application. The Show Active (#2) tab shows the activities not completed. The Activity (#3) column shows the names of each activity. The Document (#4) column will show a linked document if the program has included one with that activity. Date Assigned (#5) shows the date the activity was created. Due Date (#6) shows the date you must complete the activity by. Some activities are links that will take you to a page to complete that activity for example the Provider Application (#7).
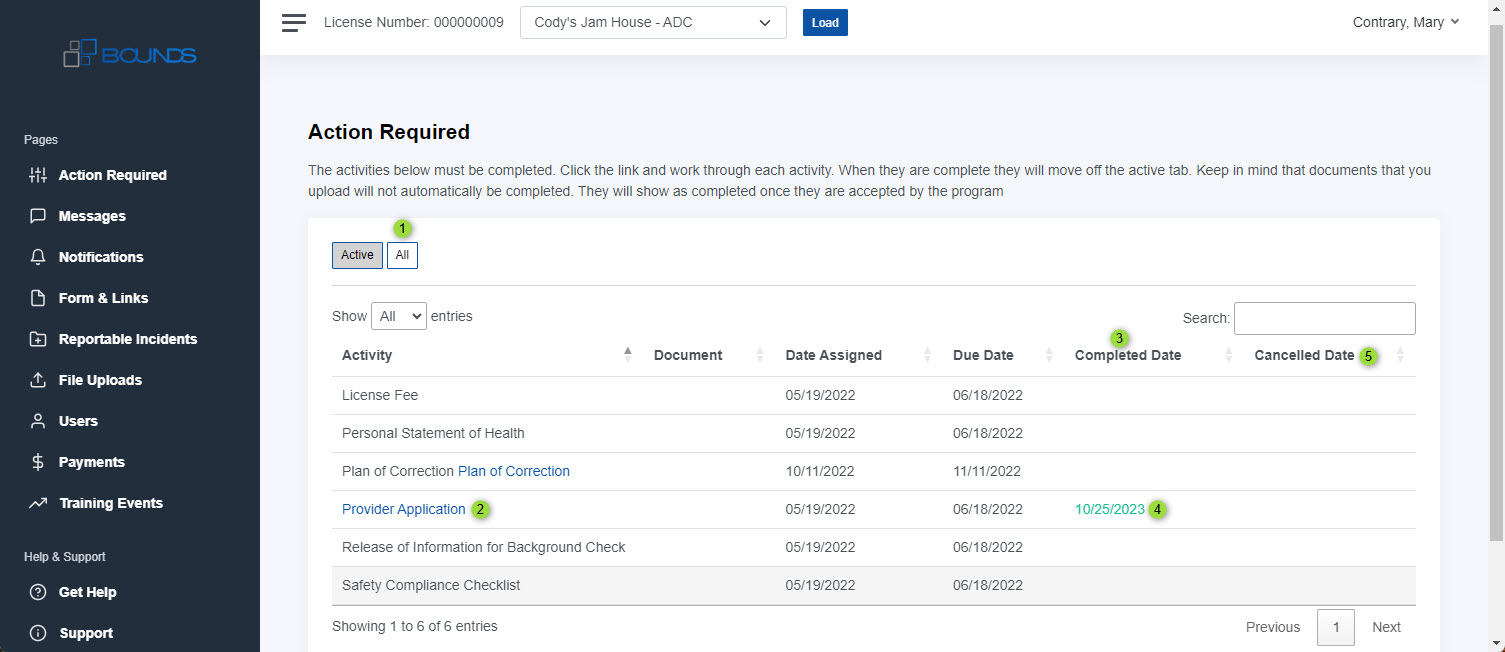
The Show All (#1) tab shows all activities. The activity for the Provider Application (#2) now shows a date (#4) in the Completed Date (#3) column. Note: if activities are canceled this tab will show a date in the Canceled Date (#5) column.
Back to Topics
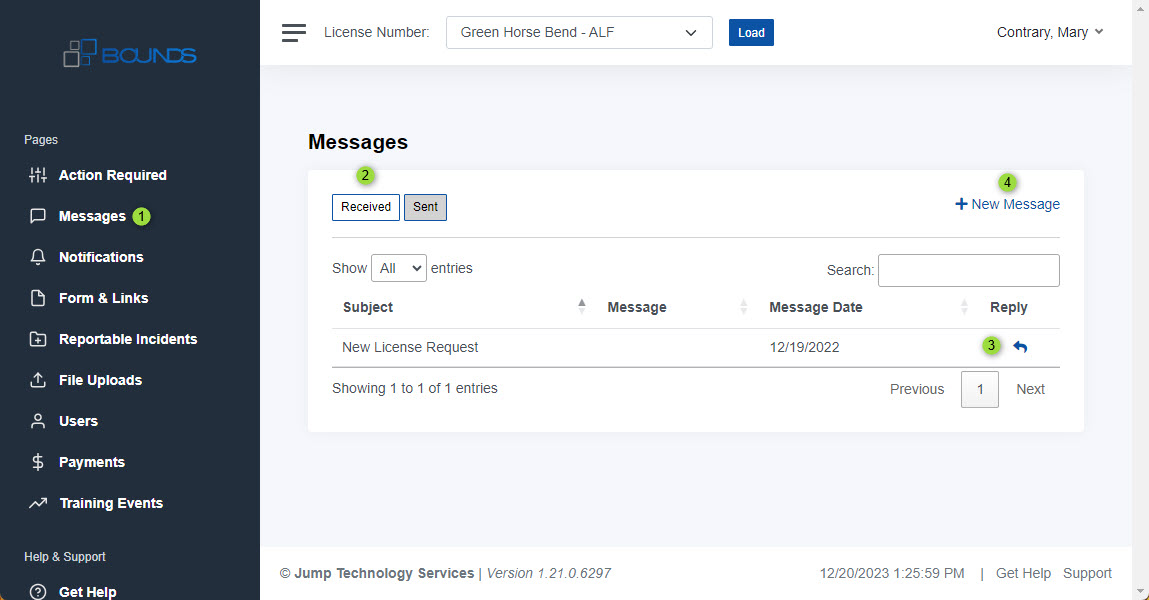
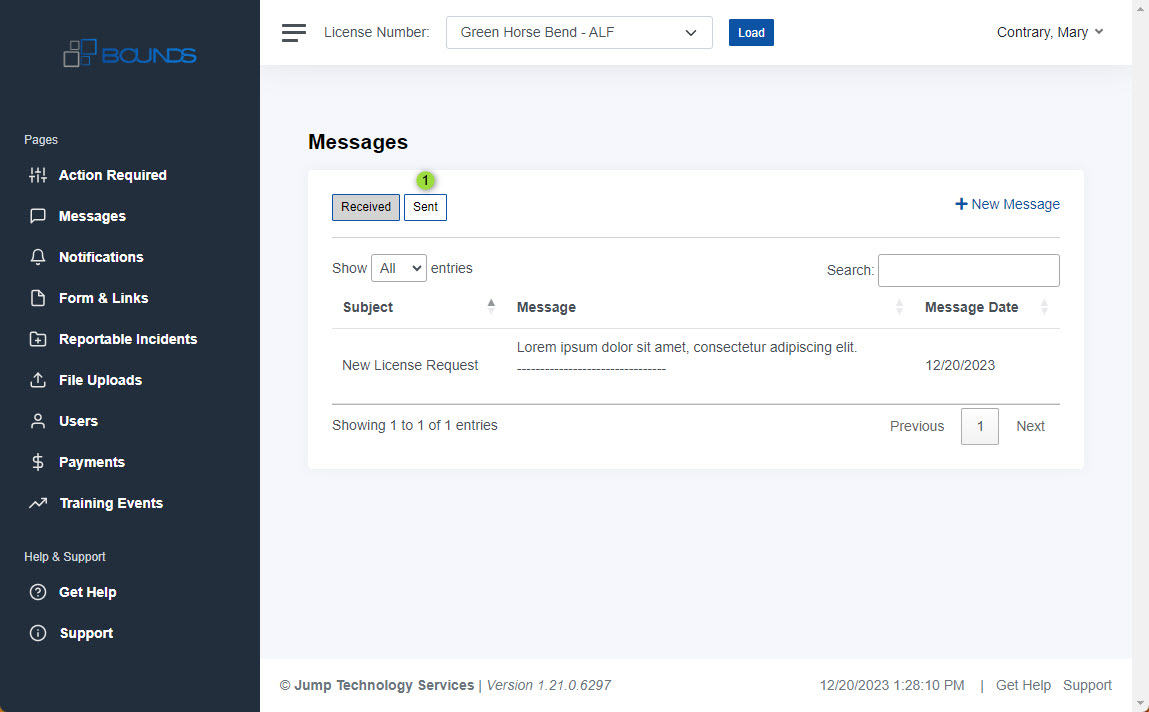
You can send and receive messages to and from the program from the Messages (#1) tab. It shows messages between you and the program. The Received (#2) sub-tab shows messages that are sent to you. Select the Reply (#3) button to reply to a message. You may also select New Message (#4) to start a new message.
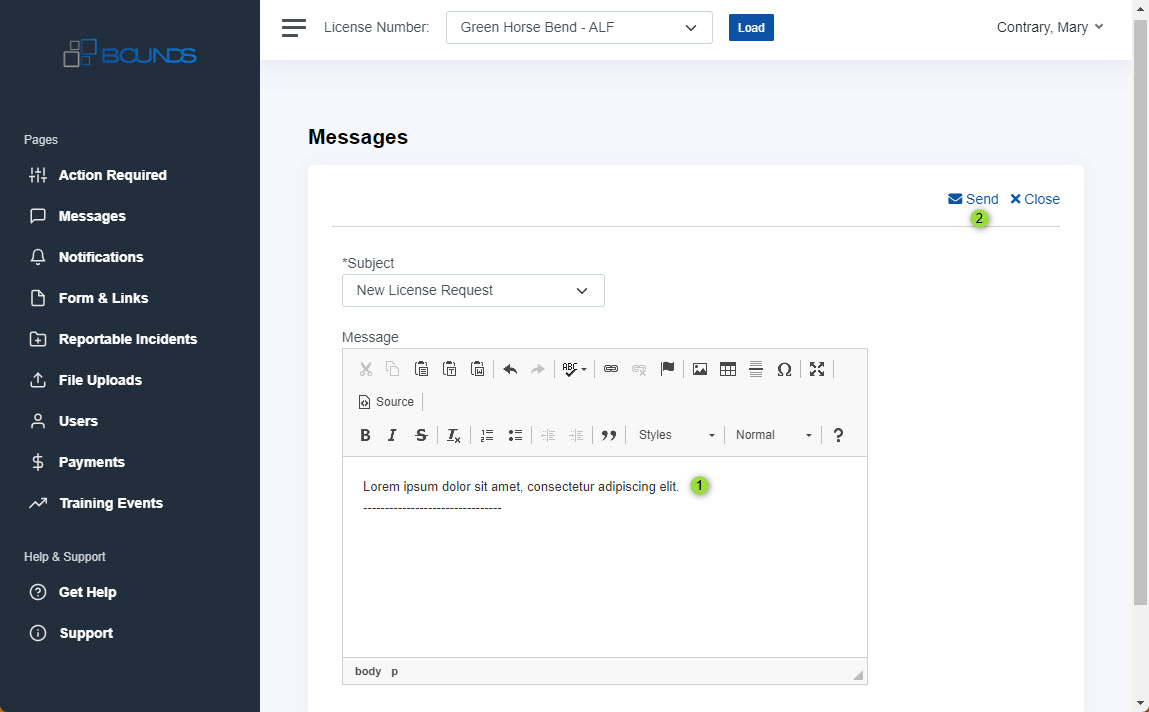
The system will load a message box. If this is a response start typing above the (#1) line. If this is a new message the Message box will be empty. When your done typing your message or response select the Send (#2) button.
Your reply or sent message will show on the Sent (#1) sub-tab
Back to Topics
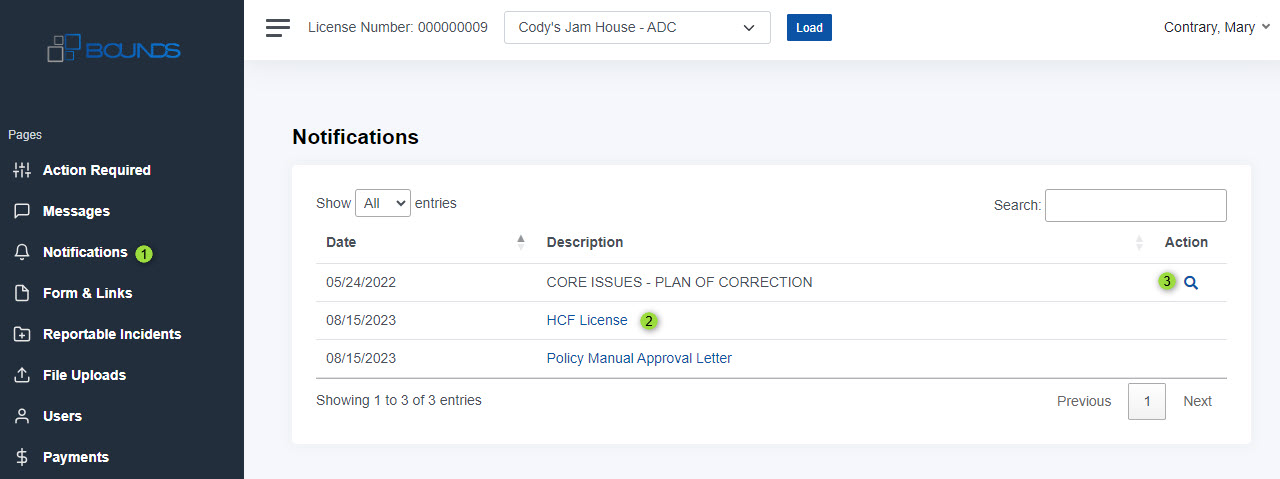
If the program is sending letters or license certificates to your portal view they will show on the Notifications (#1) tab. You may select the link (#2) in the Description column to open the document. If applicable a plan of correction will also show on this page. You may select the spyglass icon (#3) to open it. You may see more about the Plan of Correction on in the plan section on this page.
Back to Topics
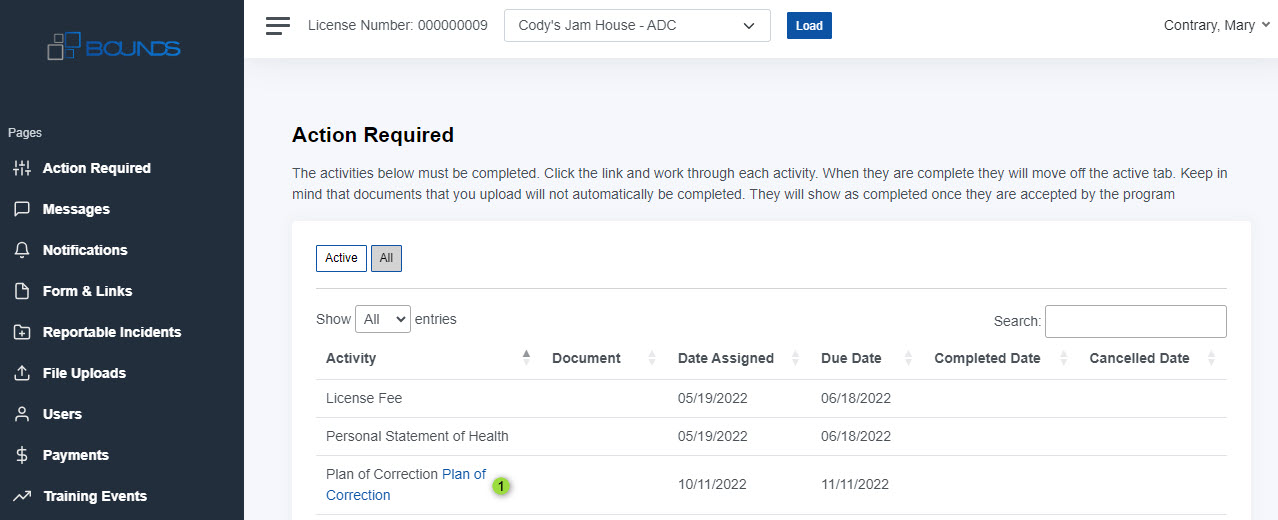
When you see a Plan of Correction (#1) action item you may select the plan of correction link.
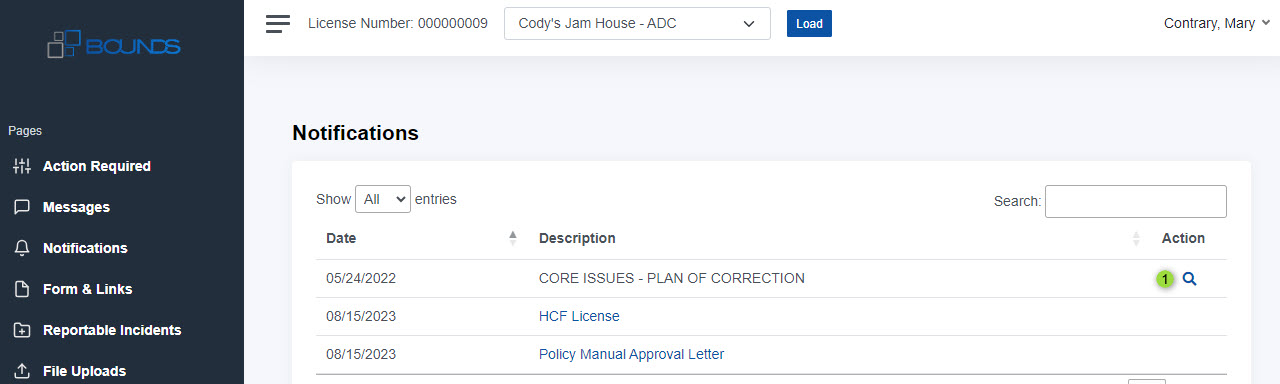
This opens the page showing all notifications including Plan of Correction items. Select the spyglass icon (#2) to open the report.
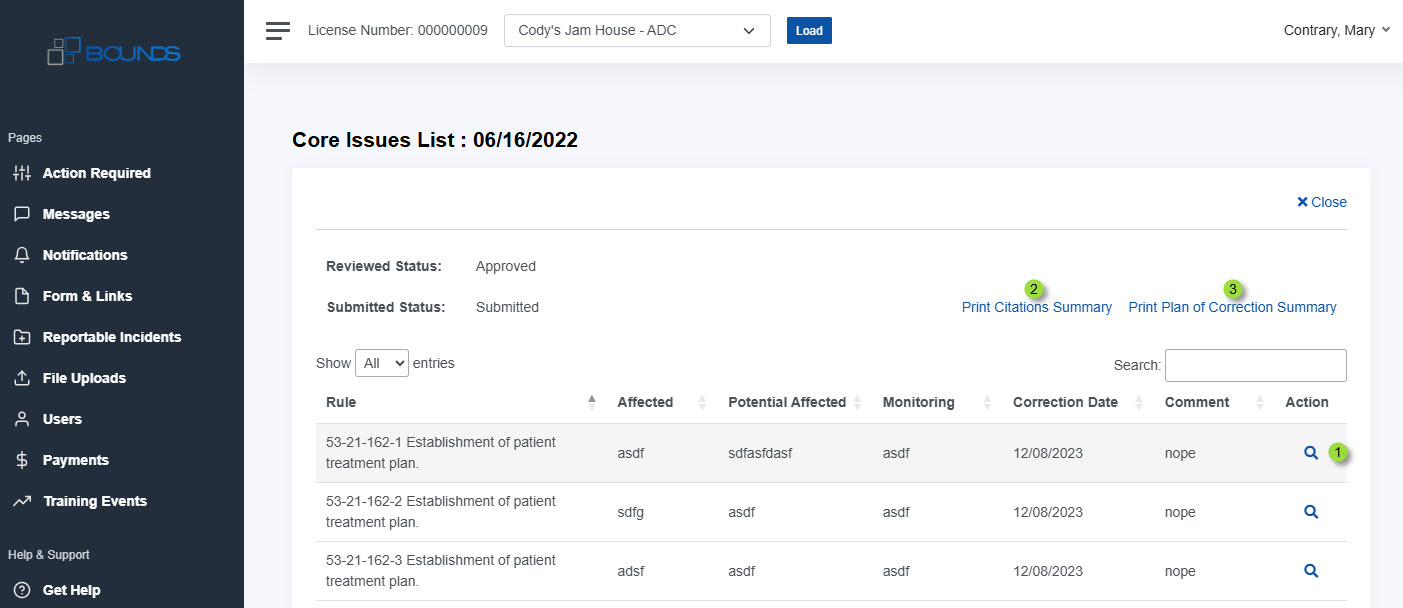
Once opened you'll see each rule(s) that needs to be addressed. Select the spyglass icon (#1) next to each one. Note there is a Print Citations Summary (#2) link that will print the citations to a document. You will also see a Print Plan of Correction Summary (#3) that will print the full plan of correction once the POC is approved.
You can view the full description of the issue to be addressed and enter your narrative into the relevant boxes to describe your plan to address each item. Be sure to select the Save (#1) button when you're finsihed. OIG will receive a notification when you're finished and review your plan of correction.

Back to Topics
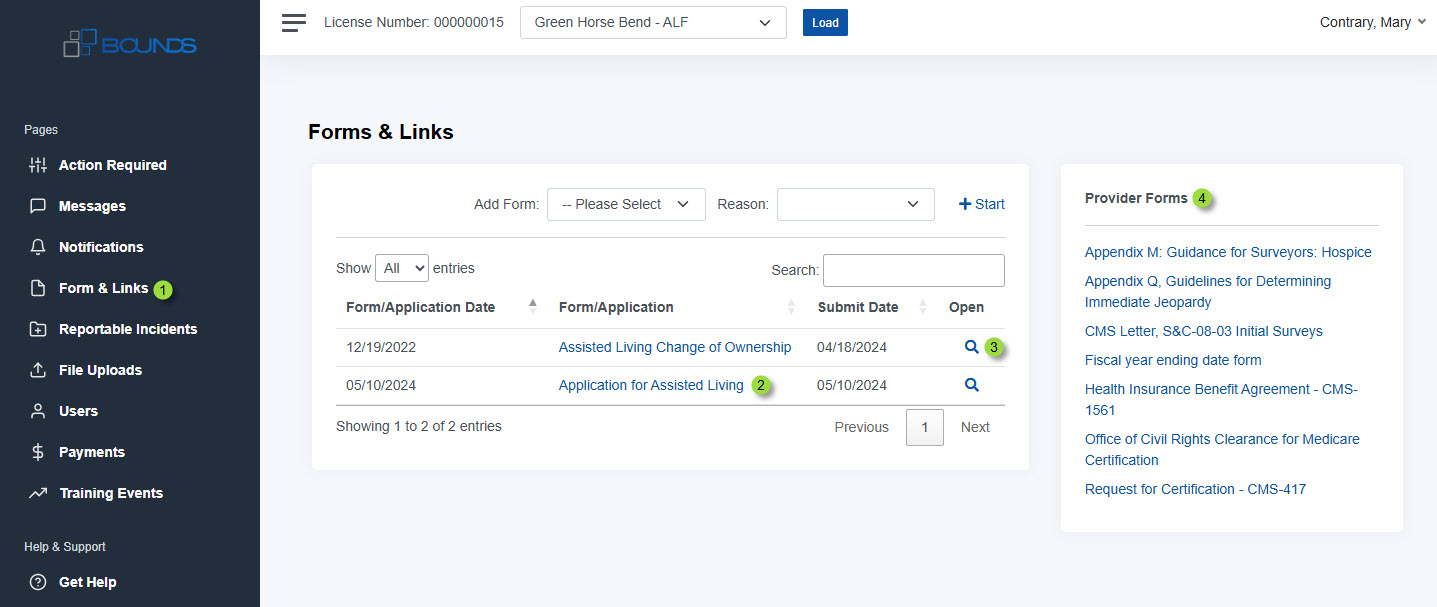
The Forms and Links (#1) tab shows online forms in the grid to be completed. Select the link under the Form/Application (#2) column or select the spyglass icon in the Open (#3) column to start the form. See more about the provider application form below.
The links on the right under Provider Forms (#4) are documents provided by the program that are available for download. Some of these forms are linked to Action Required items already.
Provider Application Form
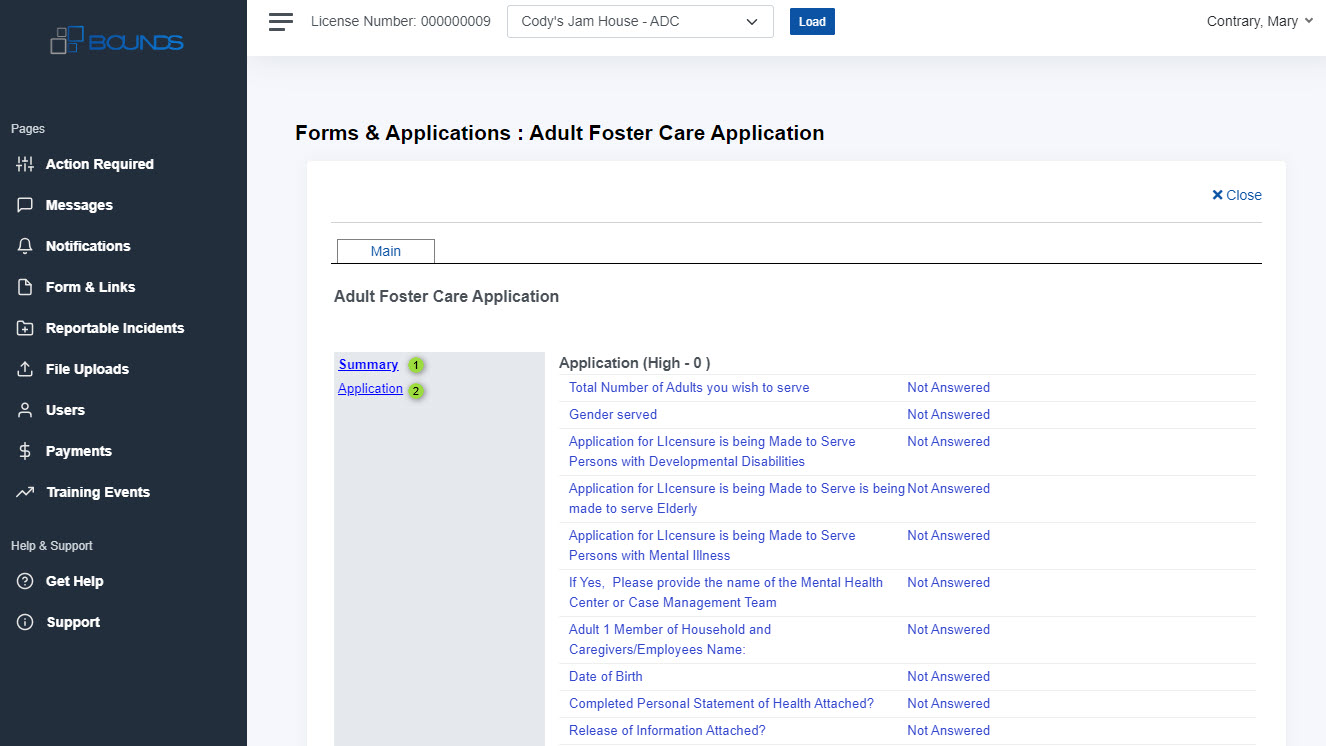
When you select the spyglass icon in the Open column the system will open the online application form. The form opens to a Summary (#1) of all the questions and answers for every section. Select a section link (#2) below the summary to view its question and answer options.
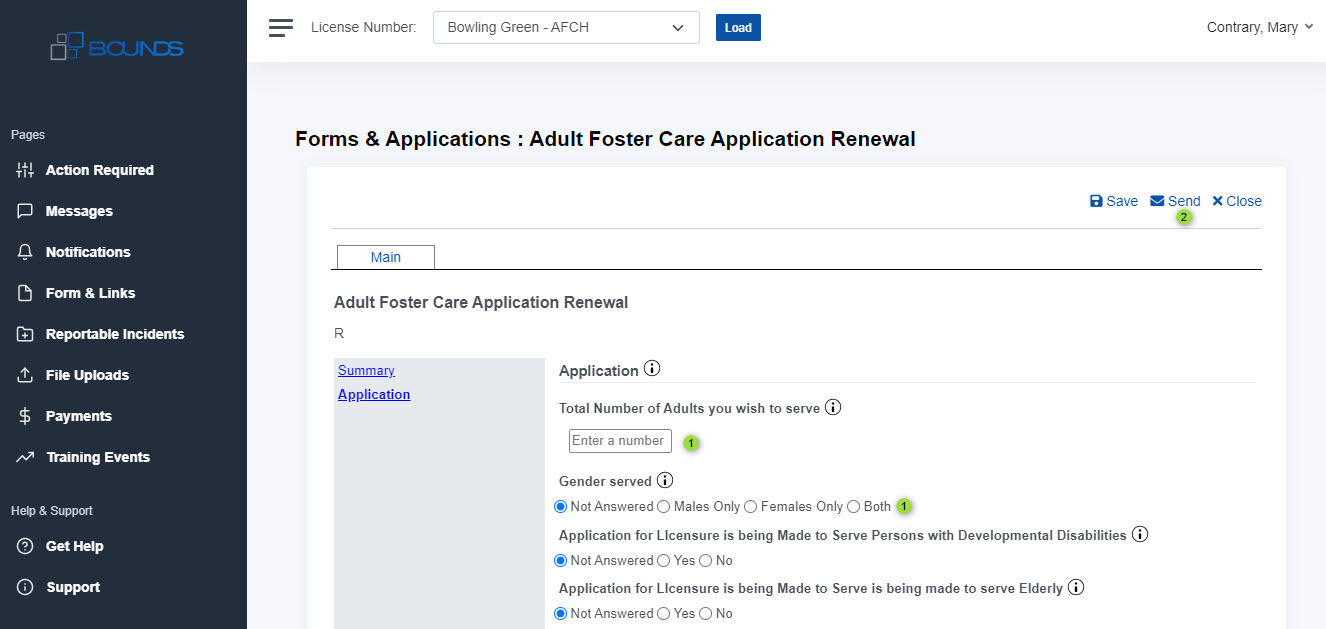
Select an answer (#1) for each question in each section. When you've completed all sections select the Send (#2) button.
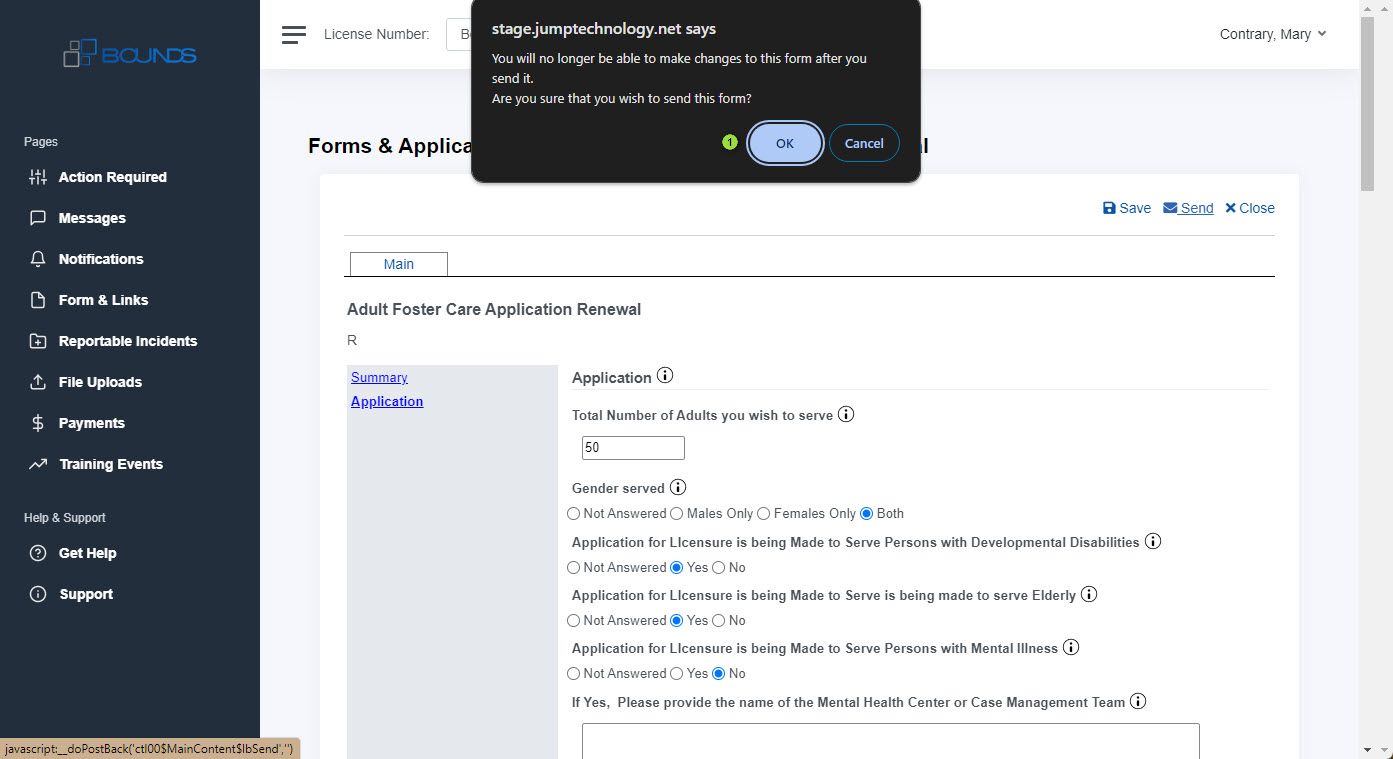
The system will confirm that you're ready to complete the form. Select the OK (#1) button.
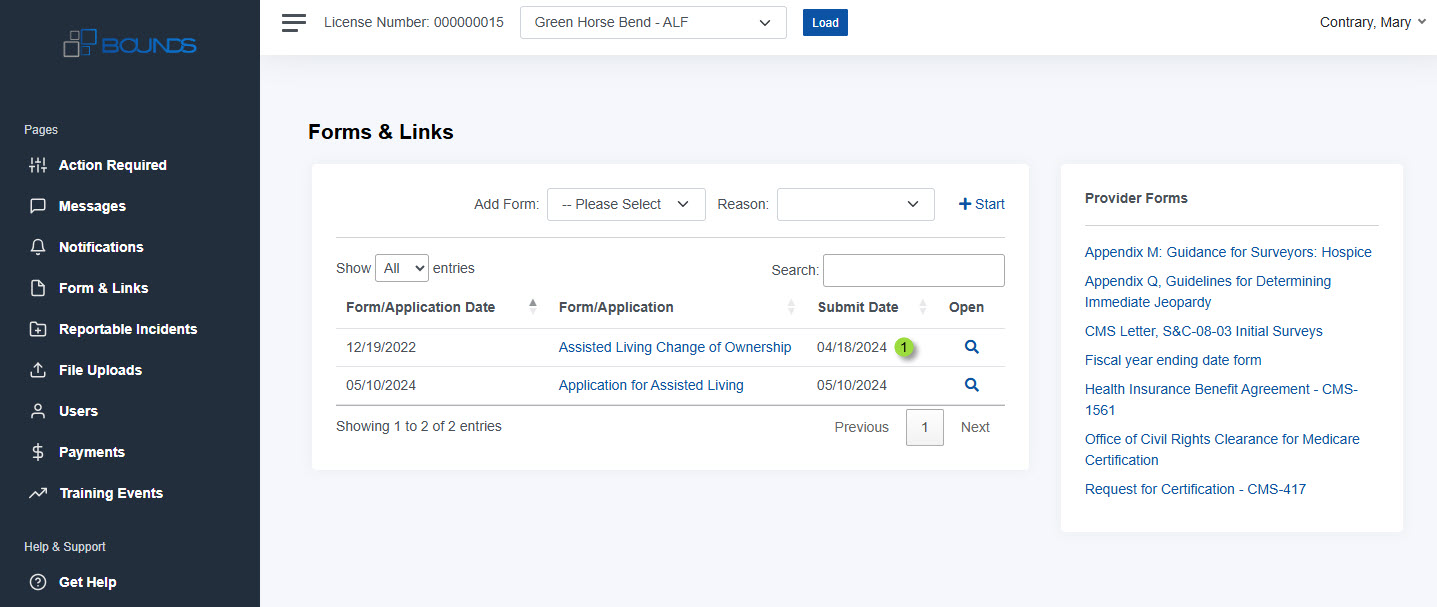
Back on the forms and links tab you'll see a date (#1) in the Submit column. Note: if you open the form after it's signed it will be read only.
Back to Topics
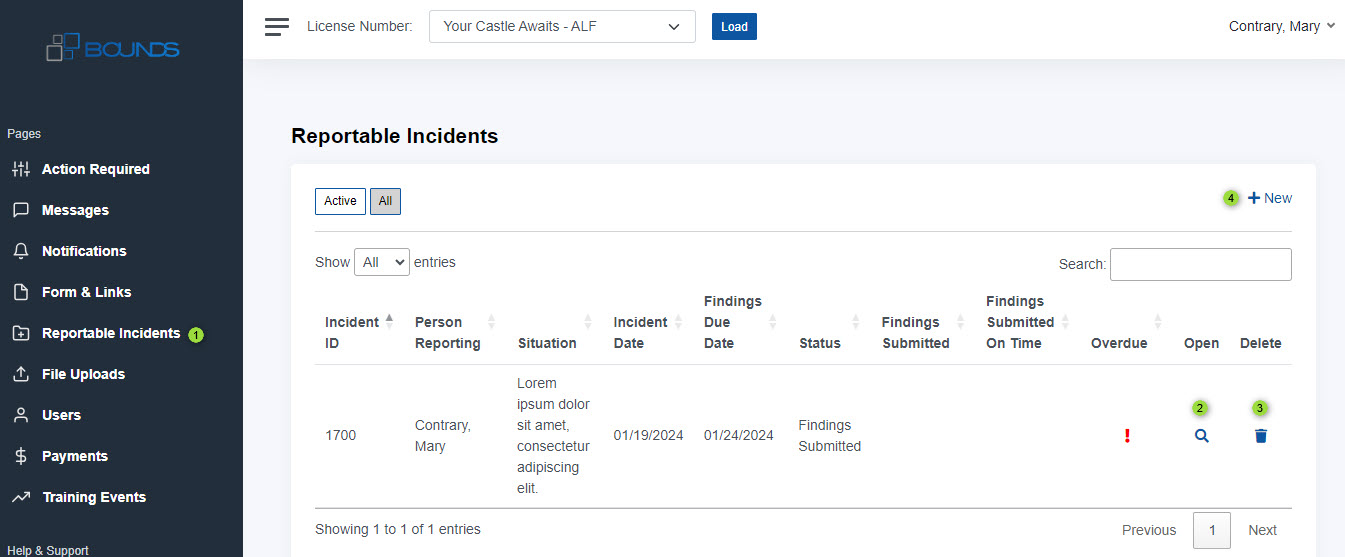
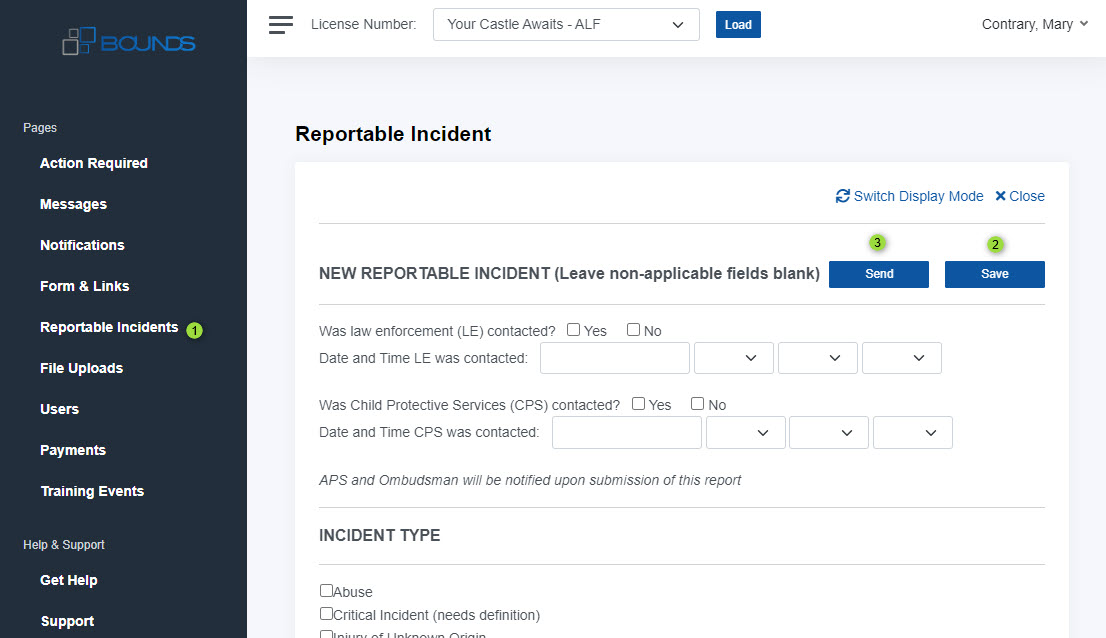
The Reportable Incidents Tab (#1) shows incidents that have been reported for your facility. You may select the Open (#2) icon to open an exiting incident report, or the Delete (#3) icon to delete an incident report. Select the New (#4) button to add a new incident report for your facility.
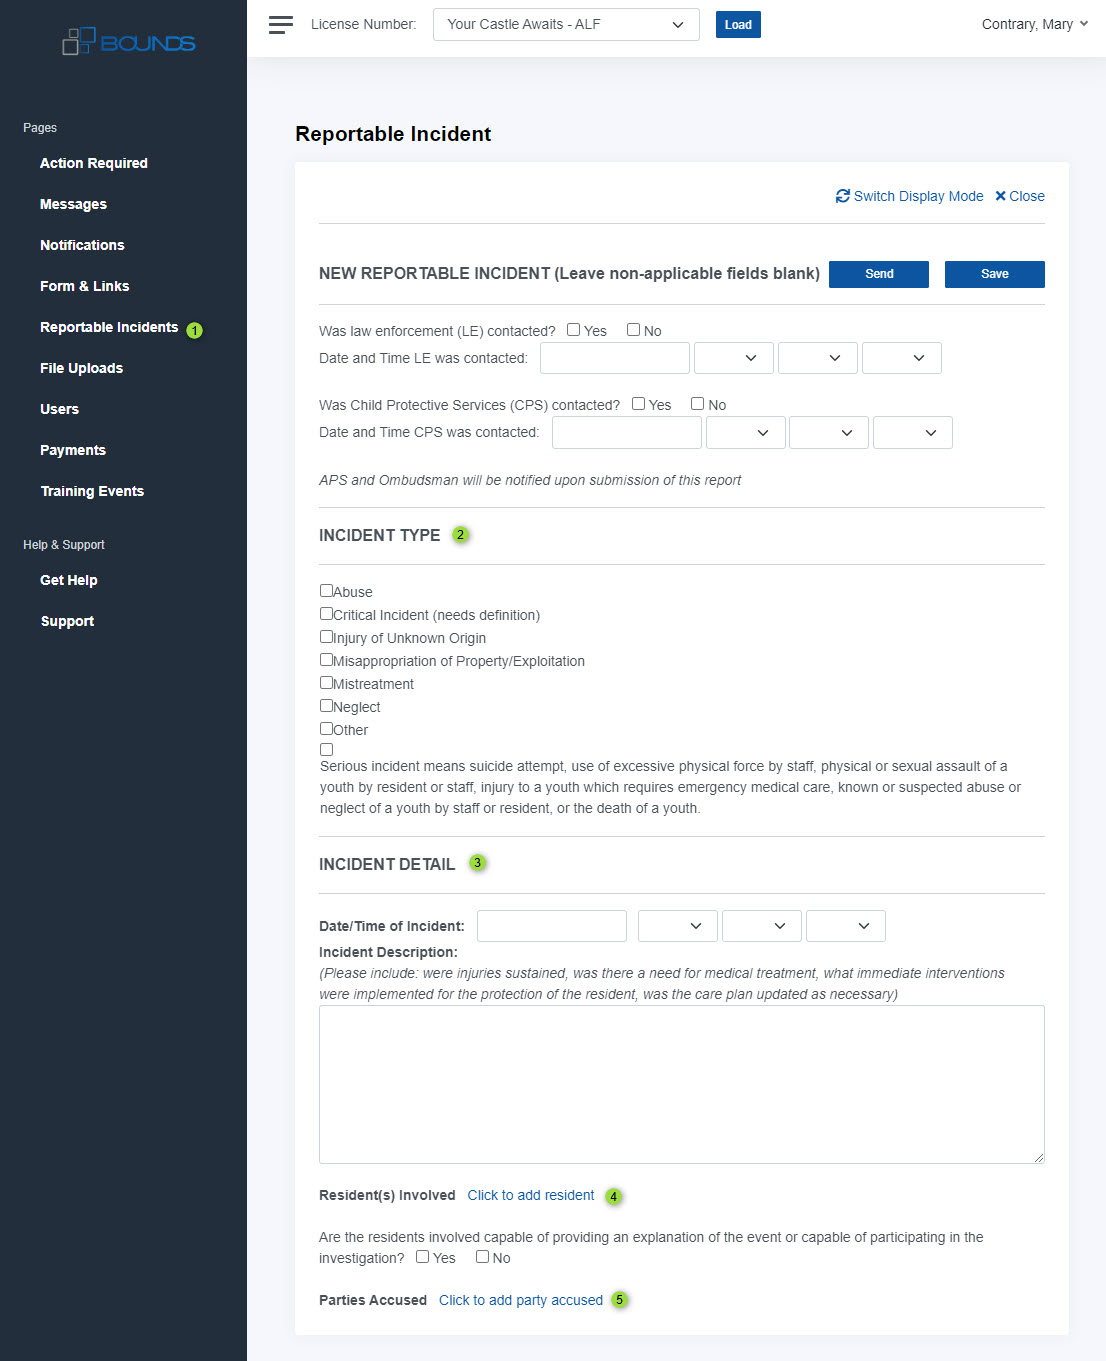
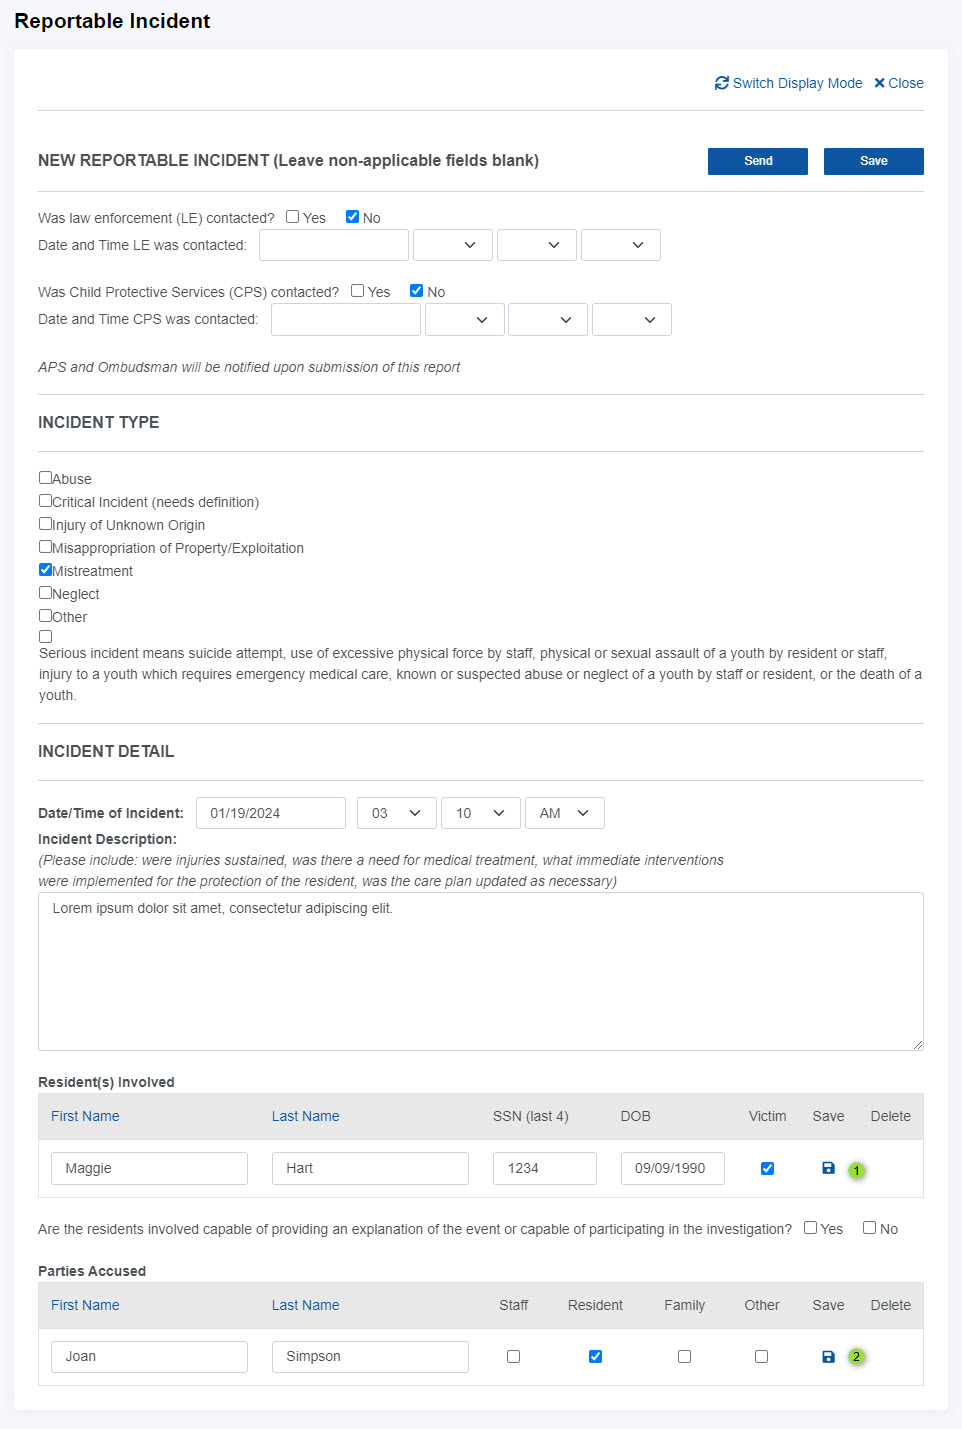
When the new incident report opens fill in all of the relevant information. Incident Type (#2) and Incident Detail (#3) are required before adding Resident(s) Involved (#4) or Parties Accused (#4). Note: When you select "Click to add resident" or "Click to add party accused" if the reportable incident has not been saved the system will try to save it before opening the fields to add residents or parties accused.
Fill in the information for the Resident(s) Involved select the Save (#1) button in the row. Then fill in the information for the Parties Accused if applicable and select the Save (#2) button in the row.
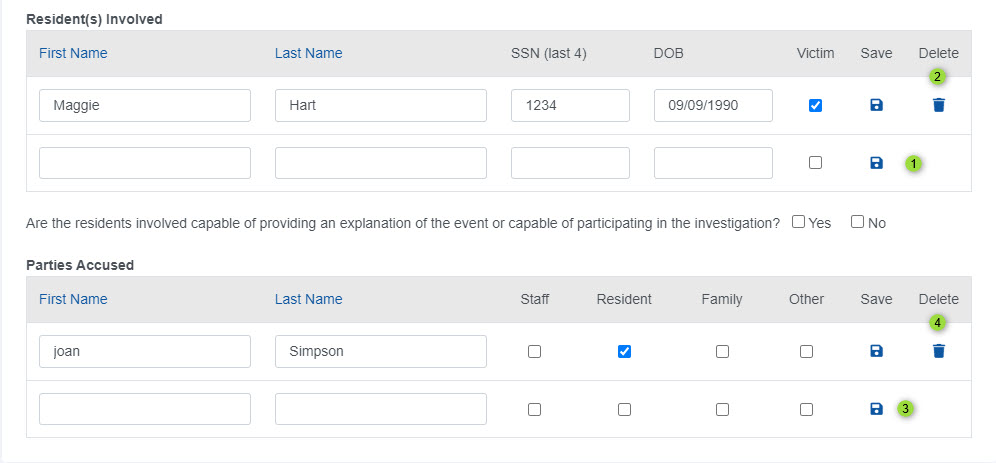
Once saved you may add another row to each section and select the appropriate Save (#1) (#2) button for the section or you may delete an entry by selecting the Delete Icon (#3) (#4).
You may save the Incident Report for later by selecting the Save (#2) at the top of the page or you may submit it by selecting the Send (#3) button.
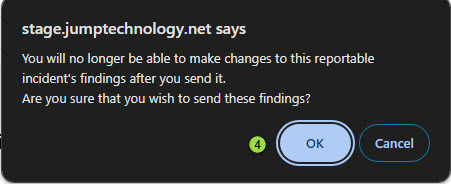
If you selected the Send button the system will confirm as the report will become read only once you send it. Select OK (#4) if you're sure you're done with the report.
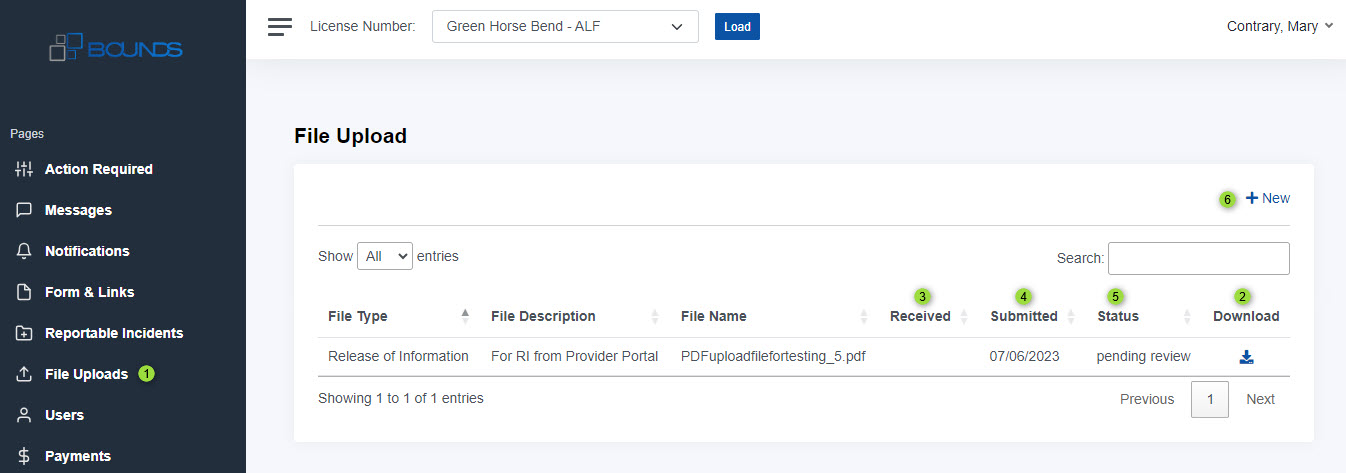
The File Uploads(#1) tab shows documents you or the program added to complete your application process. The Download (#2) column shows a download link that will download the document to your device when selected. The Received (#3) column shows a received date when applicable. The Submitted (#4) column shows a submitted date when applicable. The Status (#5) column shows the status of the document. The status will show "pending review" until the program accepts or rejects documents you've uploaded to compelete an activity on the Action Required tab. Also associated activities in the Action Required will not show complete until the status of the document is updated to “accepted” by the program.
Select the New (#6) button to upload a document.
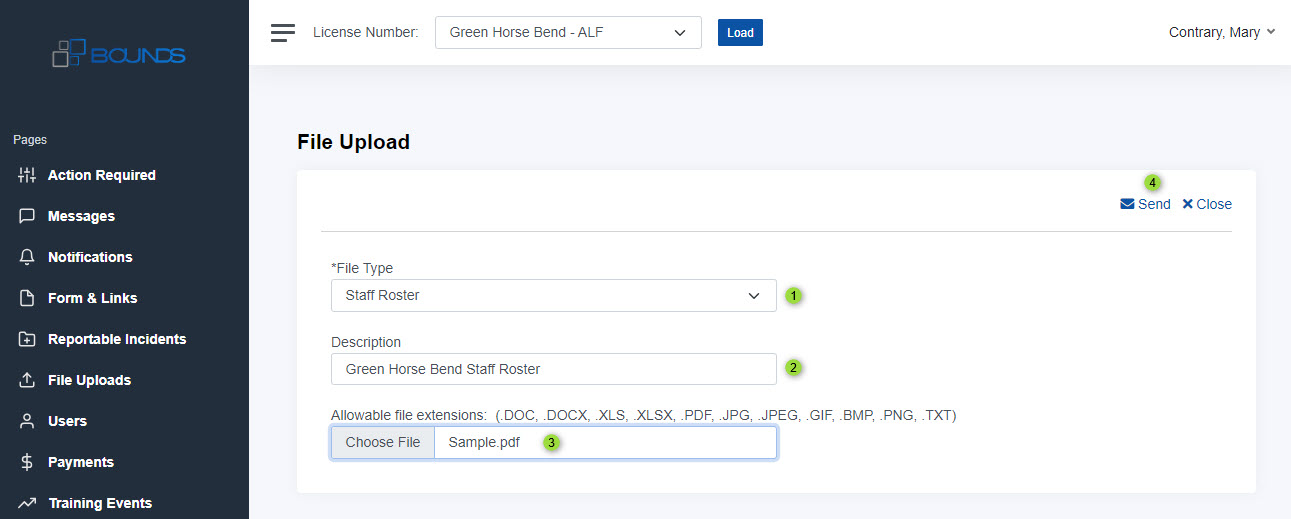
After you've selected the new button the system opens the file upload options. Select the File Type (#1) this should match the activity from the action required tab you're trying to complete. For example if the activity was to provide the program with a "staff roster" you would select that type from the selectoin box. Type in a Description (#2) for the file you're uploading. Select the Choose File (#3) button and select a file from your device. Select the Send (#4) button to complete the upload.
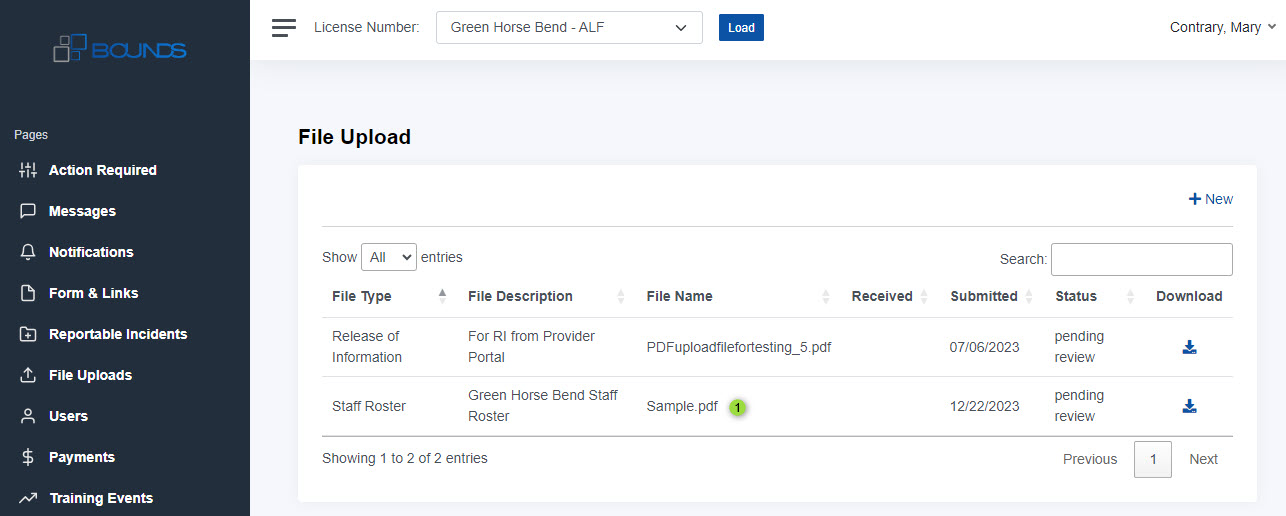
The system will reload the documents grid showing the document you've added (#1).
Back to Topics
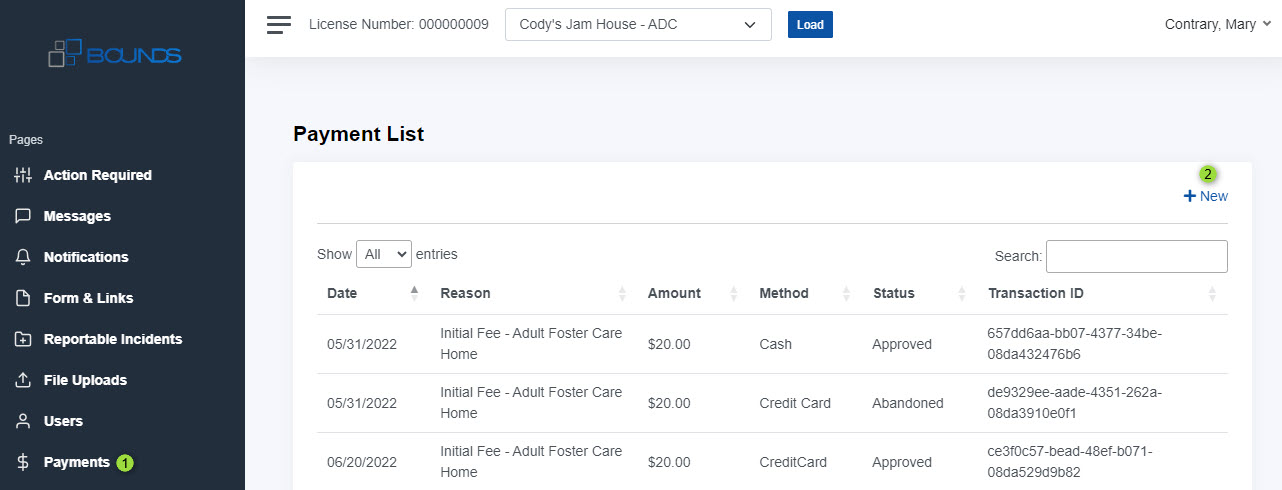
The Payments Tab (#1) will show payments for license fees entered by the administrators of the facility. Start by selecting the New (#2) button.
The payment options will open. Select the Product (#1) such as an initial fee or a renewal fee. Select the Payment Method (#2) and an Amount (#3). Fill in the Billing Information (#4). If the Shipping Information (#5) is the same you may select the "Same as Billing" (#5) option at the top of the shipping information section. Once you have all of the information filled in select the Proceed to Payment Portal (#6) button.

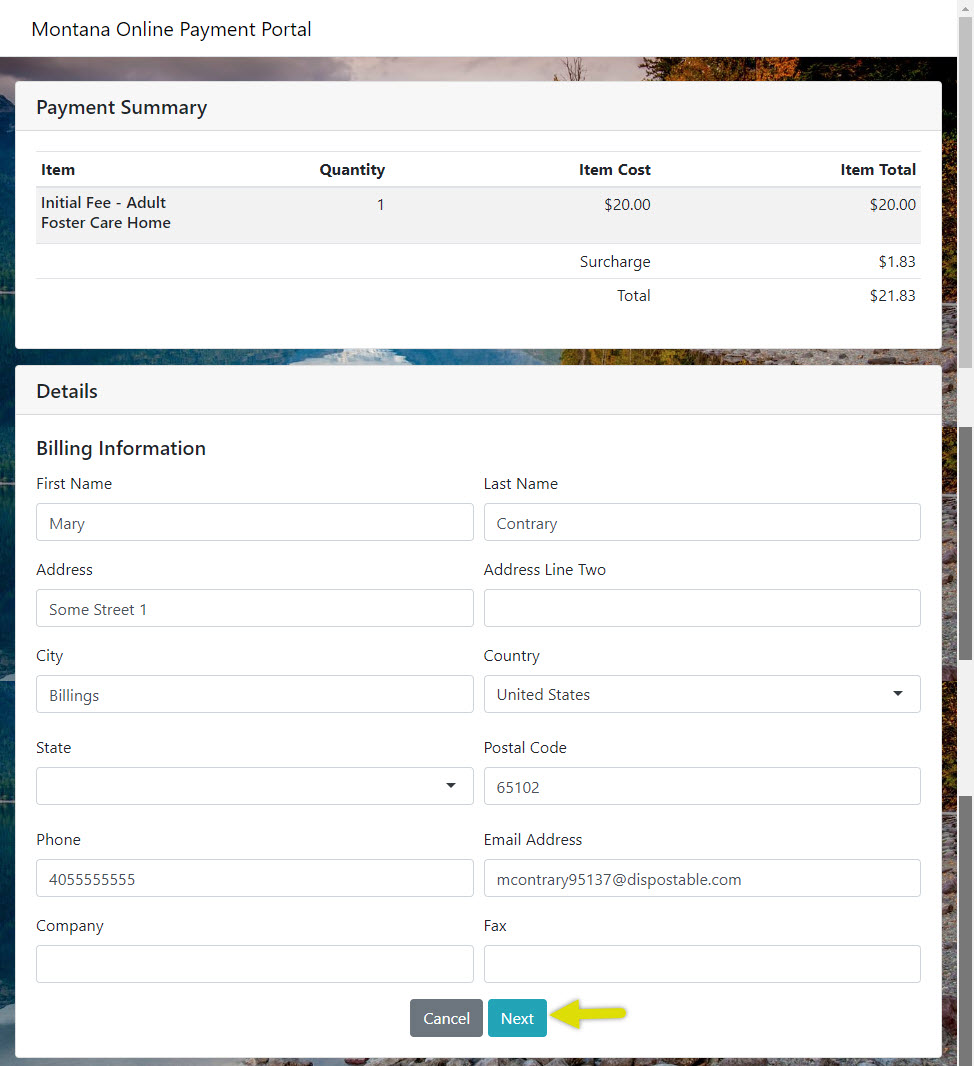
You'll now see screens from the Montana Online Payment Portal. Here are some examples. It will shows you the fee, cost and totals for your payment. Fill in any extra fields that are not pre-populated then select the "Next" button.
Please Note: The Bounds system technicians cannot support issues that may occur with the Montana Online Payment Portal. However should you experience issues finalizing your payment you may use the Messages Tab to contact the program "OIG"for assistance.
The Montana Online Payment Portal will take you to the payment information page where you will enter the information for your payment method. This example shows the credit card method. Enter the information needed for your payment method then select the "Submit Payment" button.

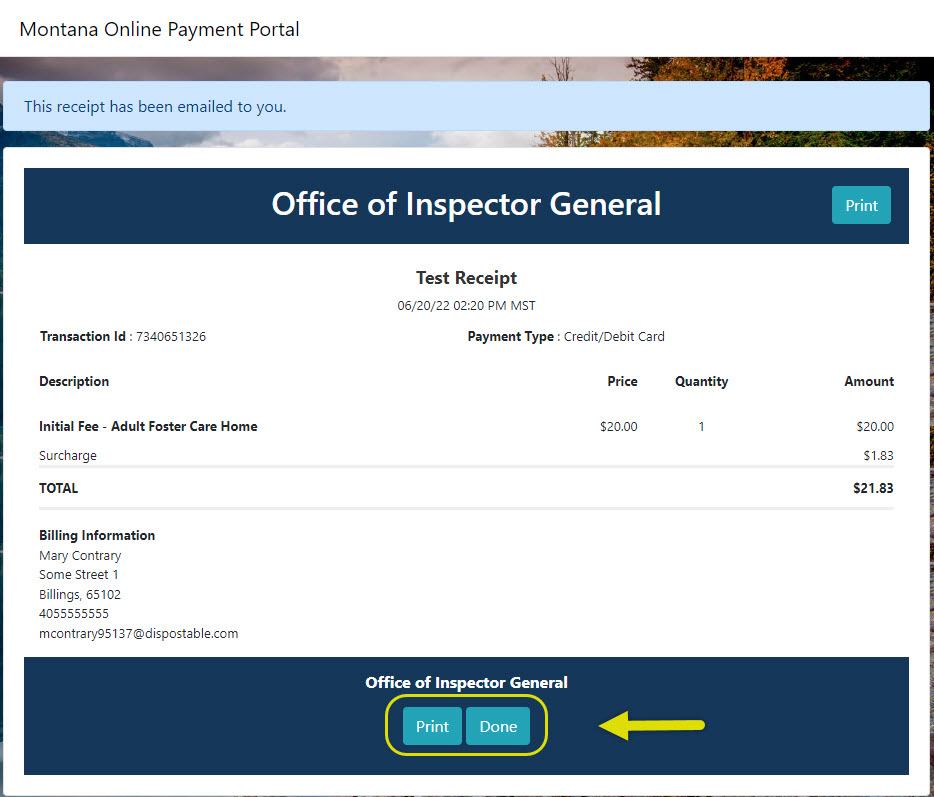
The Montana Online Payment Portal will show you your receipt. You may print it or select done to get back to the Bounds Portal.
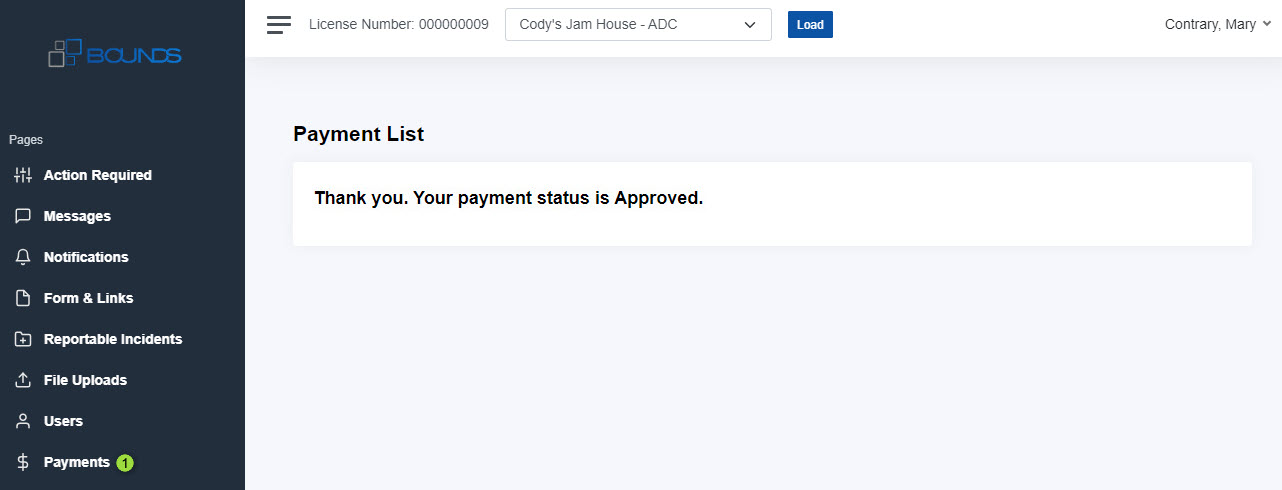
Once you select "Done" you'll be sent back to Bounds. Select the IPayments Tab (#1) again.
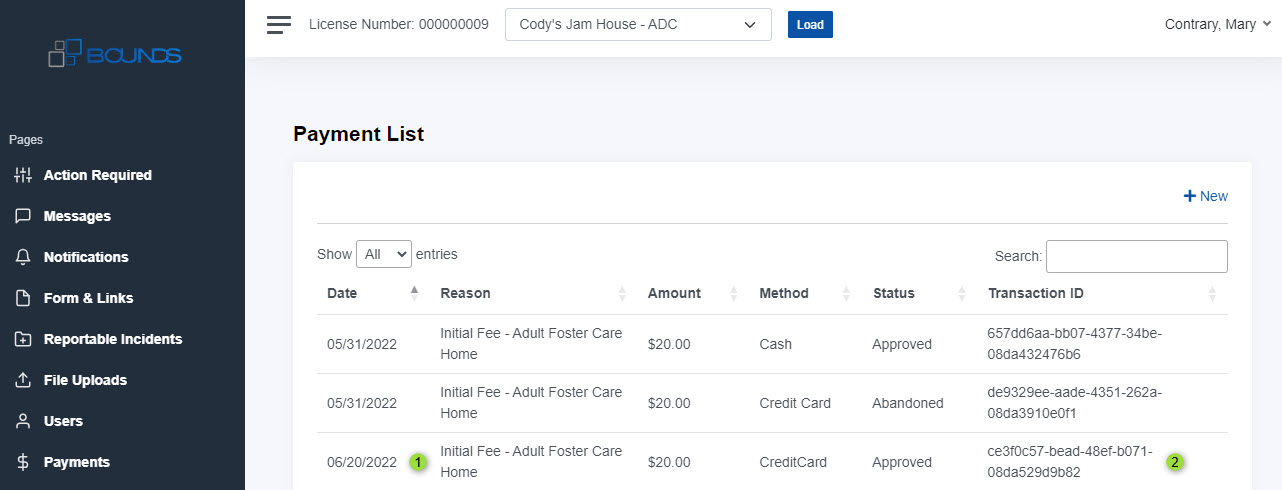
You can see your new payment listed in the grid with the Date (#1) and Transaction ID (#2).
Back to Topics
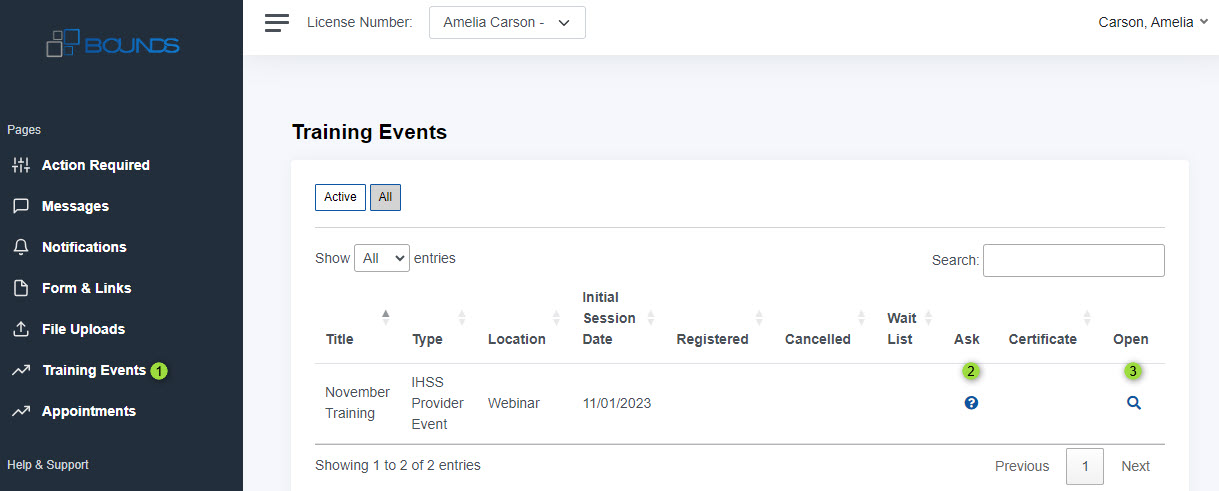
On the Training Events tab (#1), you can view, register, and ask questions about training events that are available to attend. Select the question mark icon in the Ask (#2) column to ask a question. Select the spyglass icon in the Open (#3) column to view the event.
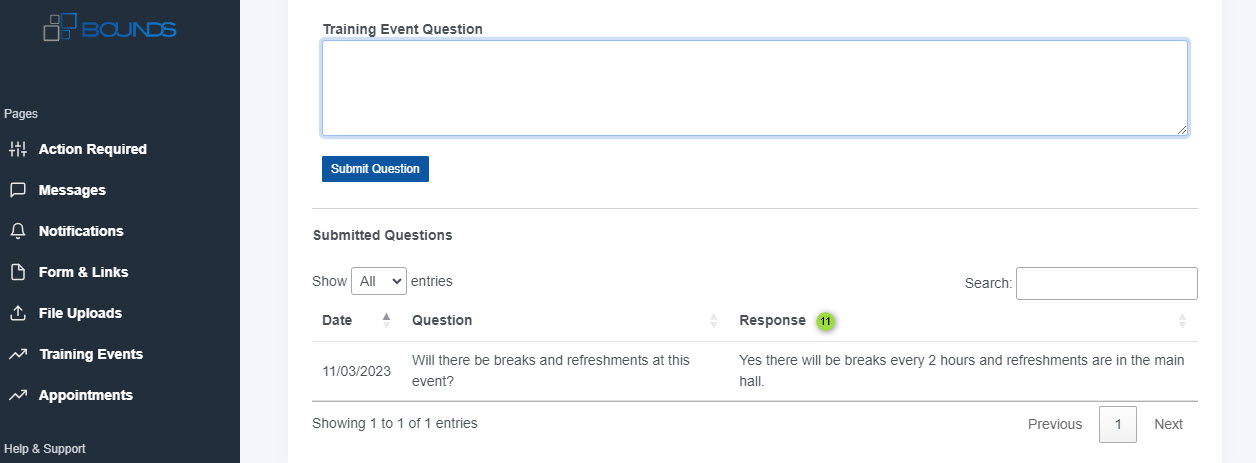
If you selected the question mark icon the system will open a question box for the event. Enter your question into the text box (#4) and select the Submit Question (#5) button.
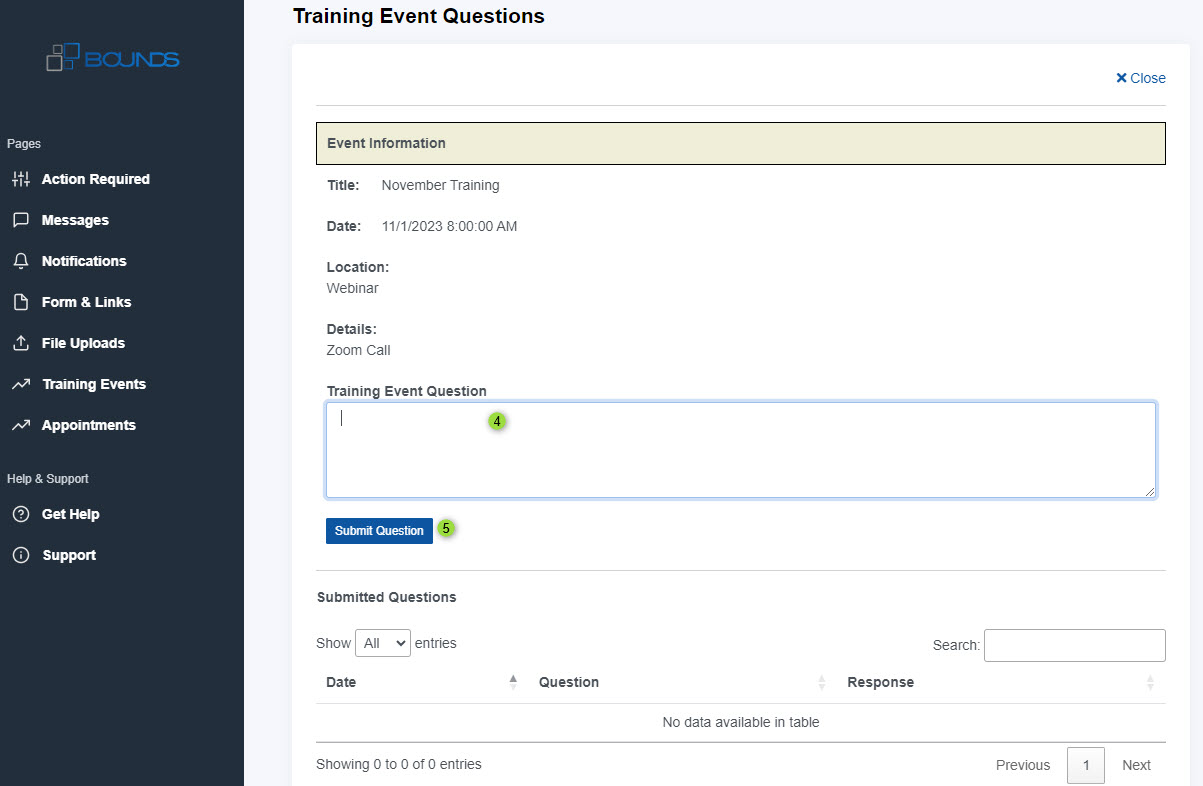
You'll see your question in the Submitted Questions (#6) grid below the button.

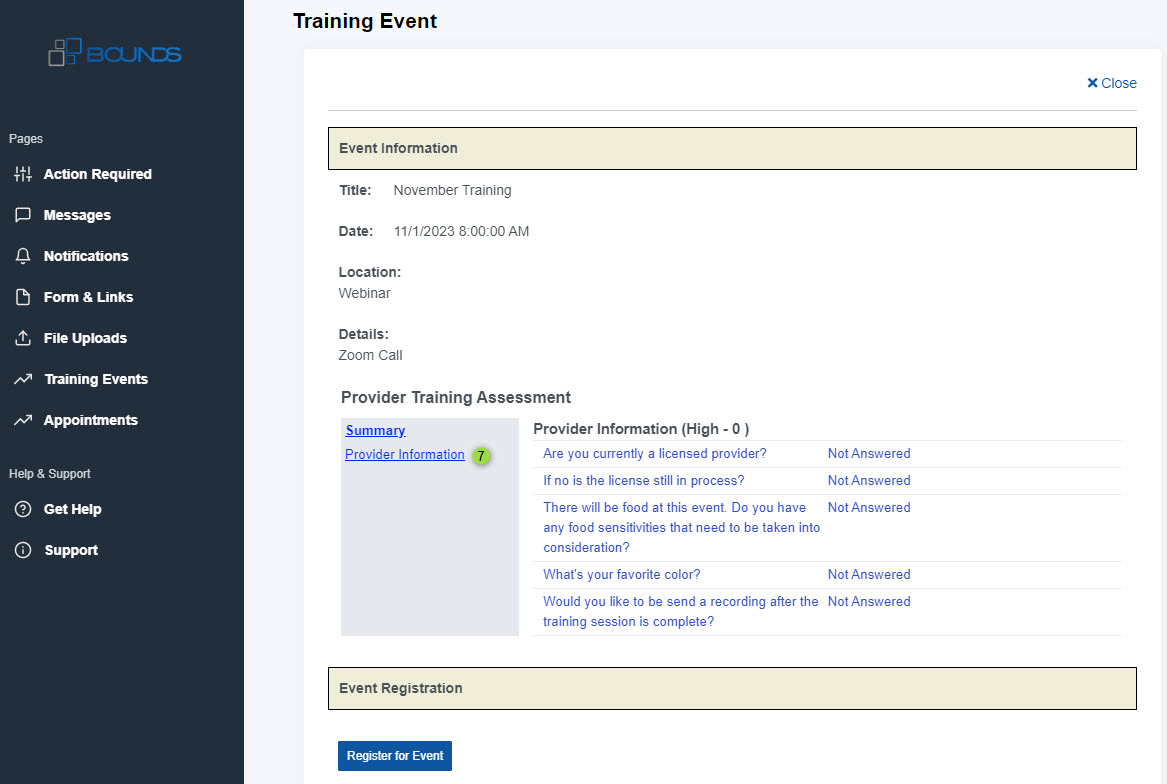
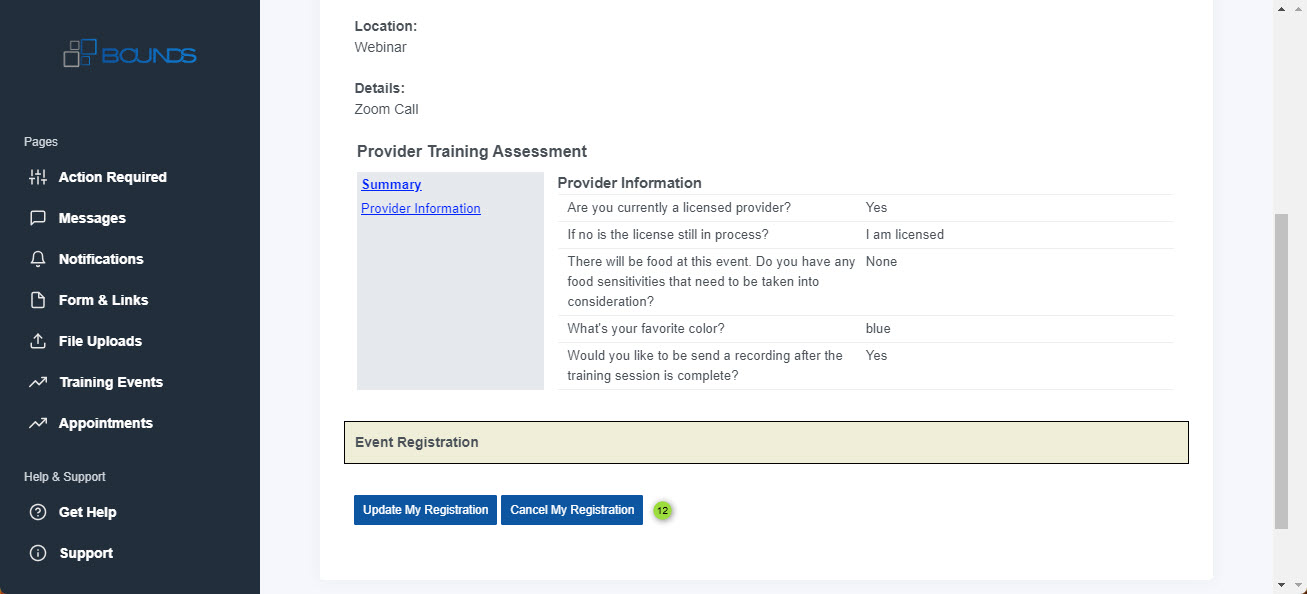
If you selected the spyglass icon the system will open "Event Information" screen The "Provider Training Assessment" will be open to a summary view. Select a section link Provider Information (#7) for example to load the questions for that assessment section.
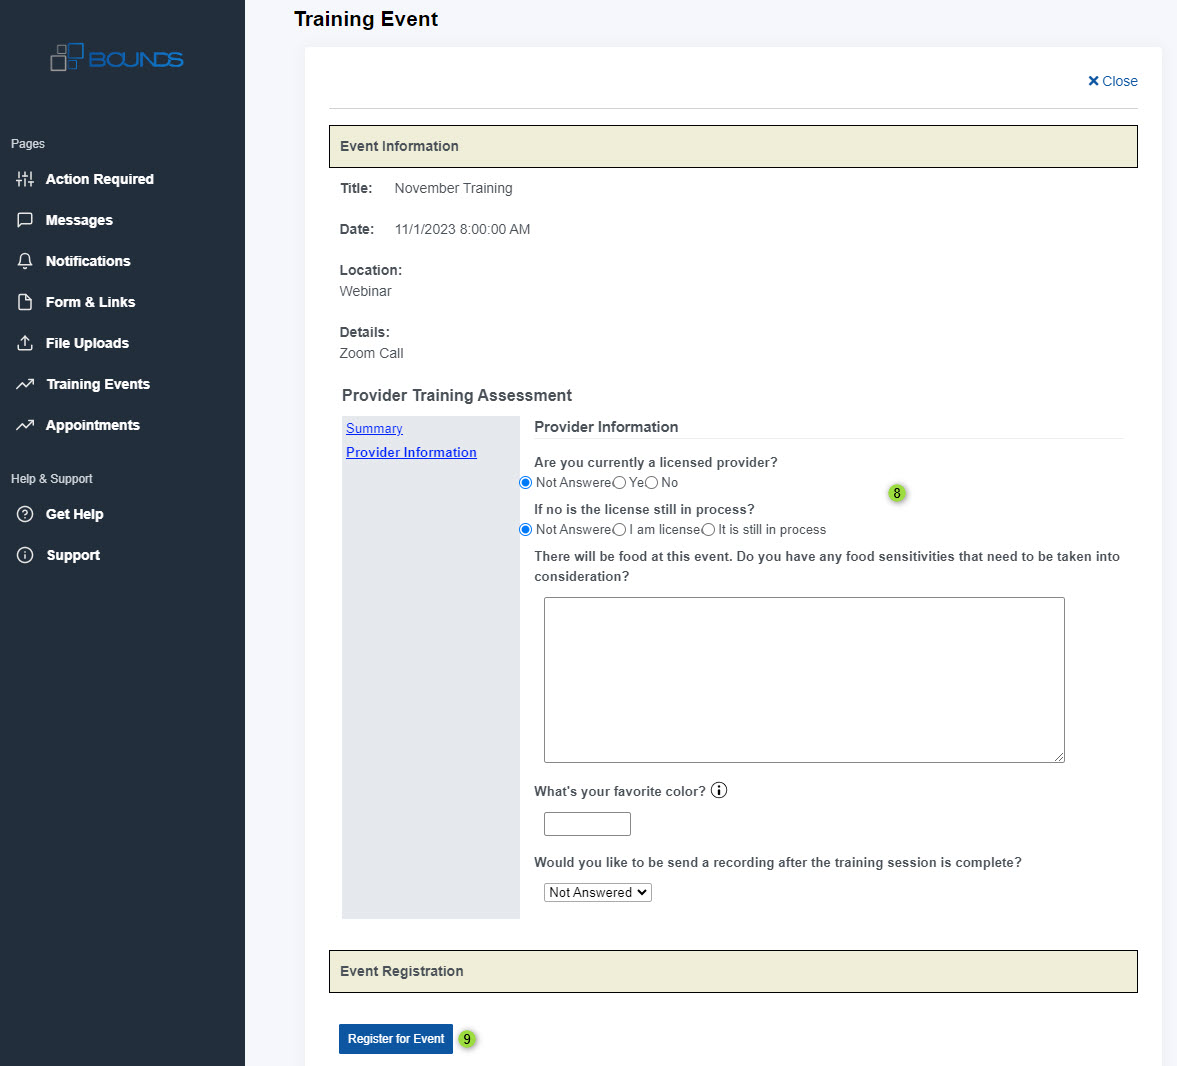
Answer the questions in the section (#8) then select the Register for Event (#9) button. If there are other links under the Summary you'll select each one and fill out any questions on those sections before selecting the Register for Event button.
The system will return you to the training events page. You'll see a checkmark in the Registered (#10) column.
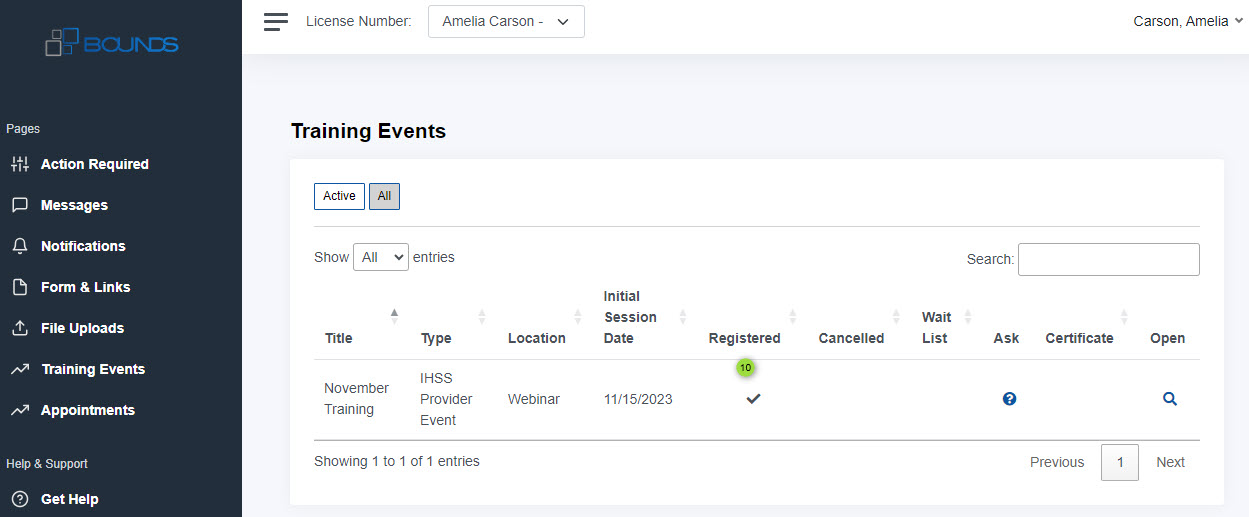
Select the ask icon to check for a Response (#11) to your question.
If you need to cancel your registration select the spyglass icon again and select the Cancel My Registration (#12) button
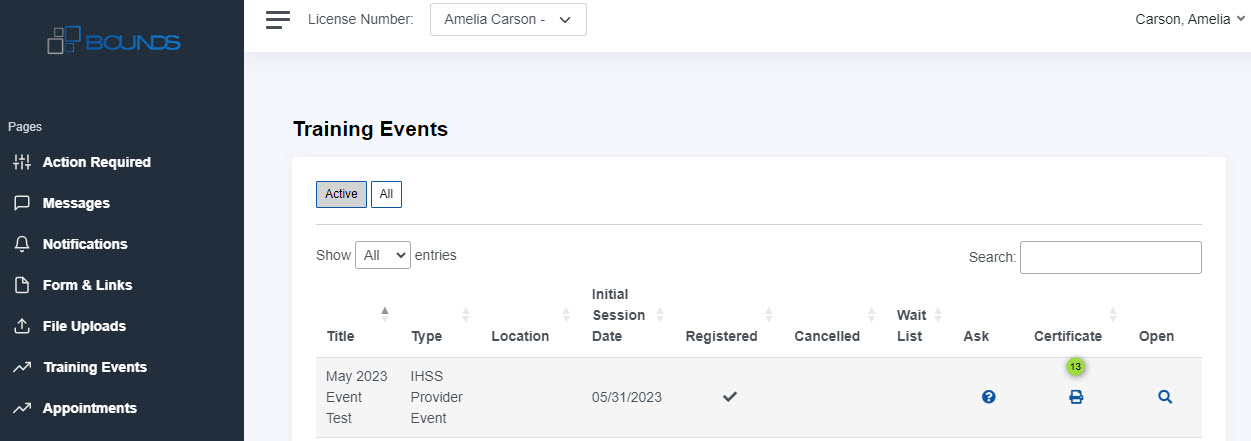
If a certificate if awarded for the event you'll see a print icon in the Certificate (#13) column after the event.
Back to Topics
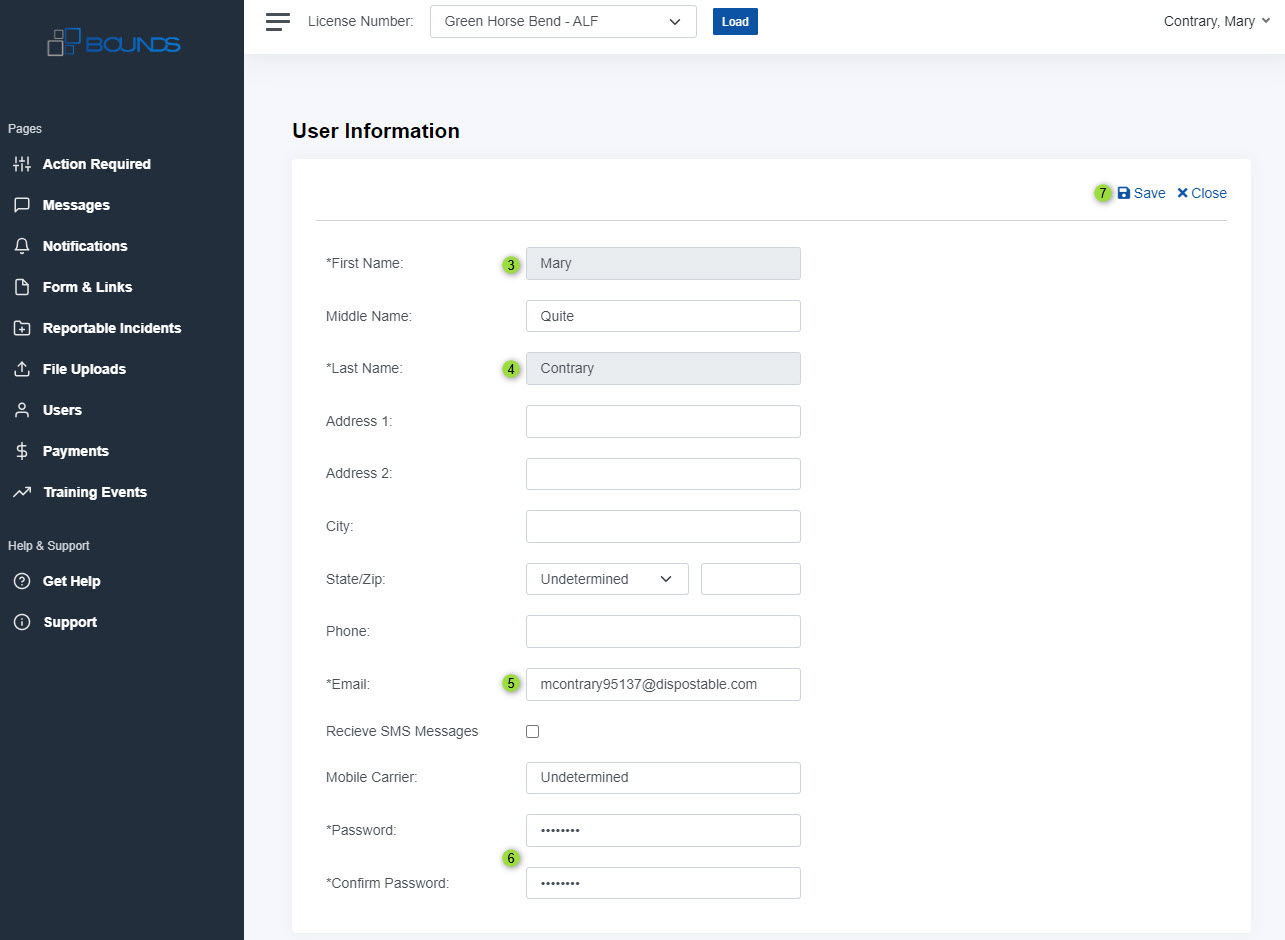
To update your account information, select your name (#1). Then select the Profile (#2) option The system will load your information page.

Your First name (#3) and Last name (#4) are locked. If you need to your name updated please use the Messages tab to notify your OIG. Required fields that must remain filled in are marked with an asterisk * like the first name, last name, Email (#5) and Password (#6) boxes. The remaining fields are optional but filling them in will make your contact record more complete for OIG. Once you have completed your desired updates select the Save (#7) button.
Back to Topics
- If you are able to log into the portal, use the Messages tab to communicate directly with your program staff. It may take a bit to hear back, but emailing JUMP Technology Services will not produce a faster response. We can not answer questions about when your application will be completed.. We only provide the software for tracking your process. If you have questions about the use of the software that is not answered in page sections above you may send an email to boundssupport@jumpfaster.com.
- Under no circumstances should you email documents to JUMP. Sending information via email places you at risk of third parties who would like to misuse information you provide. We will not assume responsibility for your actions in sending private and confidential information to us via email. The portal is a secure method for uploading information and the encryption used protects confidential information but only if you are logged into the portal.
Back to Topics / Back to Top